Group Policy Overview
This tutorial will introduce you to Group Policy, a tool that allows you to centrally manage and apply user and computer settings and restrictions to maintain a consistent computer environment. Group Policy is made up of Group Policy Objects that arrange registry settings in a meaningful way, and can be managed using the Group Policy Management Console. Group Policy Objects can be divided into User Objects and Computer Configuration Objects, and are linked to an Organizational Unit to become effective. This tutorial includes information on different types of Group Policy filtering and delegating GPO management. I created this tutorial to help me practice concepts for my upcoming Microsoft interview as a Sr Solutions Architect.
Group Policy Overview
Maintaining a consistent computer environment can be challenging. We need a way to configure and enforce user and computer settings and restrictions. Group Policy gives us the tools we need to administer such an environment by giving us an area to centrally manage and apply these settings and restrictions.
Group Policy Components
Group Policy Settings are really just configuration settings that allow us to modify the computer and user specific registry settings on domain computers. If you have ever opened REGEDIT.EXE, you know that trying to manipulate registry settings directly can be confusing and daunting. If anything, the registry is not really oriented in a way that is meant to be modified directly. Group Policy is really just a collection of Group Policy Objects that arrange registry settings in a meaningful way. It’s kind of like the UI to a database called the registry.
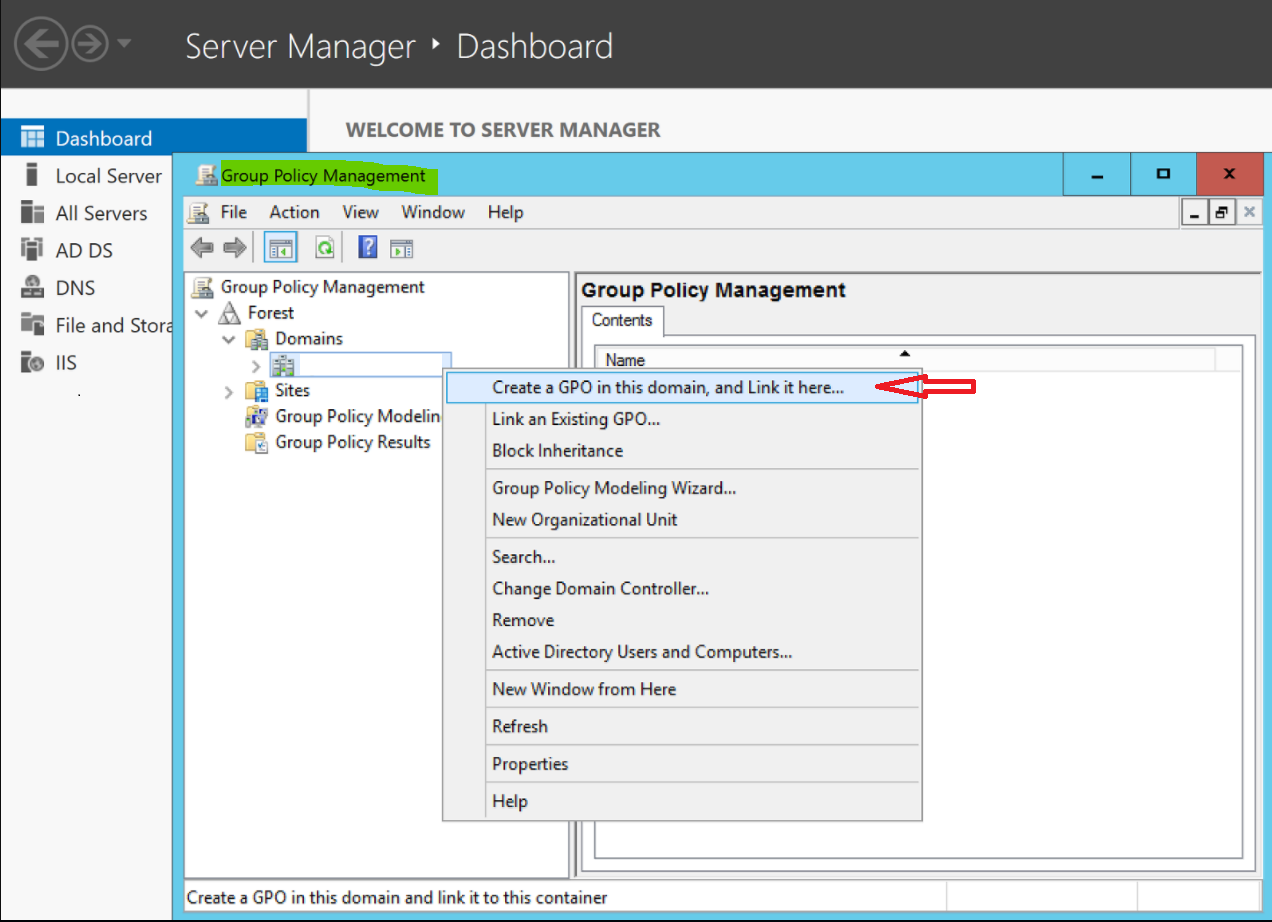
Group Policy Management
The Group Policy Management Console is the tool used to modify these Group Policy Objects. You’ll notice that the console mimics very much the Active Directory Users and Computers console in the layout of Organizational Units (OUs). Keep this in mind as we move forward as all Group Policy Objects are simply created in one spot, the Group Policy Objects folder and are then linked to an OU to actually become effective. GPOs never sit inside an OU, they are only linked to one.
Group Policy Objects
There are two types of Group Policy Objects we can create. User Objects and Computer Configurations Object. Computer Configurations and apply to any users that log into the computers within the Computer OU they are linked to. User Configurations Object are similar with the only real differentiator being that they need to be linked to a User OU with users.
To force the policy to become active, we can run
GPUPDATE /FORECE
on one of the computers we linked the policy to. Then, we must log off and then back on.
For each setting you’d like to configure, it is recommended that a new Group Policy Object is created. This is to keep things more organized and consistent. For example, if you wanted to set a wallpaper, and map a network drive, you should create one Group Policy called Corporate Wallpaper and another called Corporate Network Drive.
Policies and Preferences
Policies are normally registry values that are updated to no longer exist once we remove/unlink their policy. So, if we apply a policy based GPO, the registry is edited, and then if we later remove it, the modified registry settings are restored to the original values.
Preferences, on the other hand, permanently creates registry values, and unless we go and manually edit the registry to remove this preference, the original settings can never be restored, even if we unlink the GPO. Also the settings applied via preferences are user specific. If a user wants to change them, they can do that, whereas policies cannot be changed by the user. An example of this would be a mapped drive, where the user can decide to go into My Computer and un-map the drive.
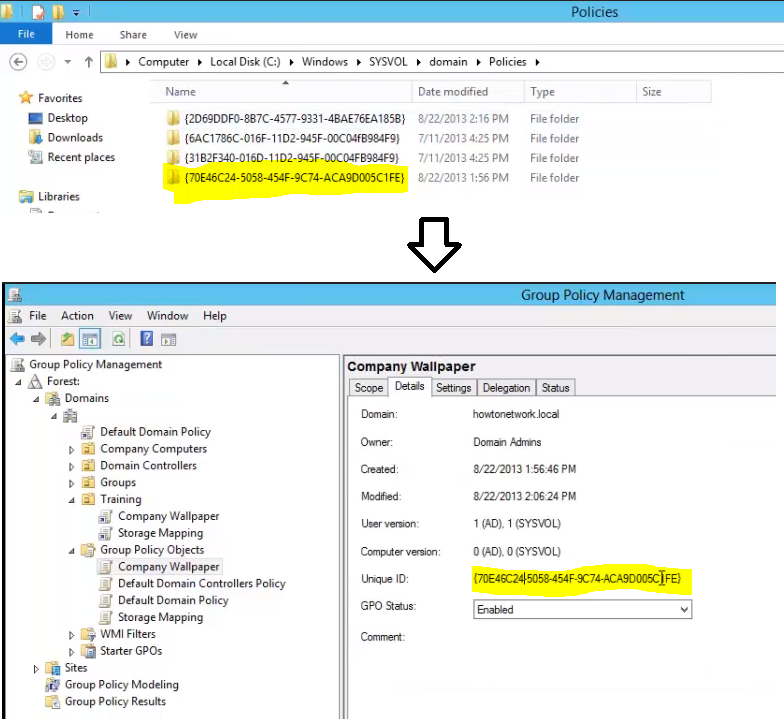
Policies
All local group policy objects are stored locally on the client on C:\Windows\SYSVOL\domain. From here you can see the Policies listed. They are arranged by GUID, which can be matched up the actual policy if desired:
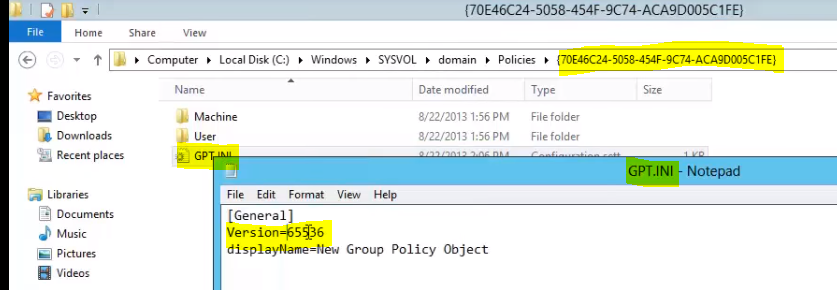
Within this folder we will see a GPT.INI configuration file, which contains a version number. The next time GPUPDATE.EXE is run, it is this version that Group Policy will match up with the object on the domain controller to determine if an update is required. If the version numbers match, no update is needed, and if they do not, an update is synced and applied.
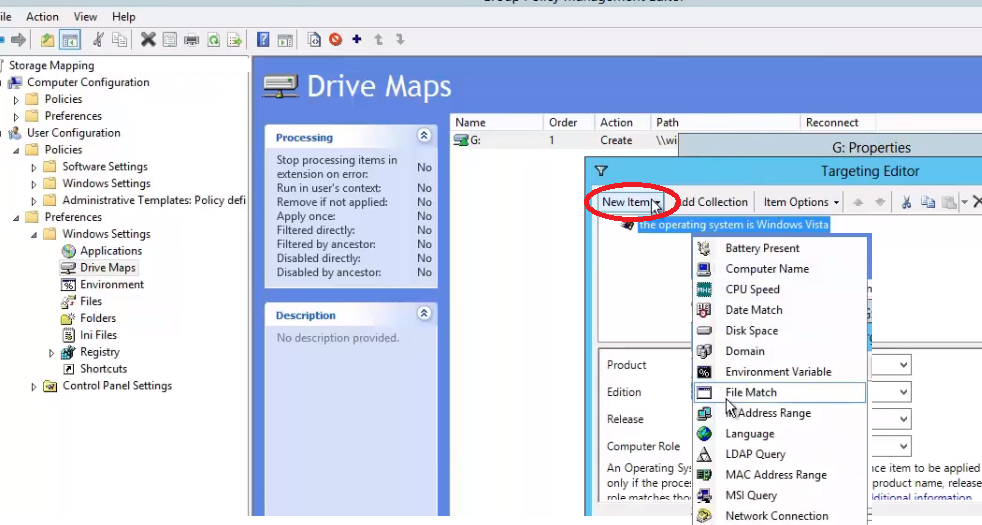
Preferences
As we mentioned, Preferences, as opposed to Policies can be disabled by the user and are not removed from a system, even if a GPO is no longer linked to it. Another neat feature of a preference is the ability to target them to a whole slew of options such as in the example below:
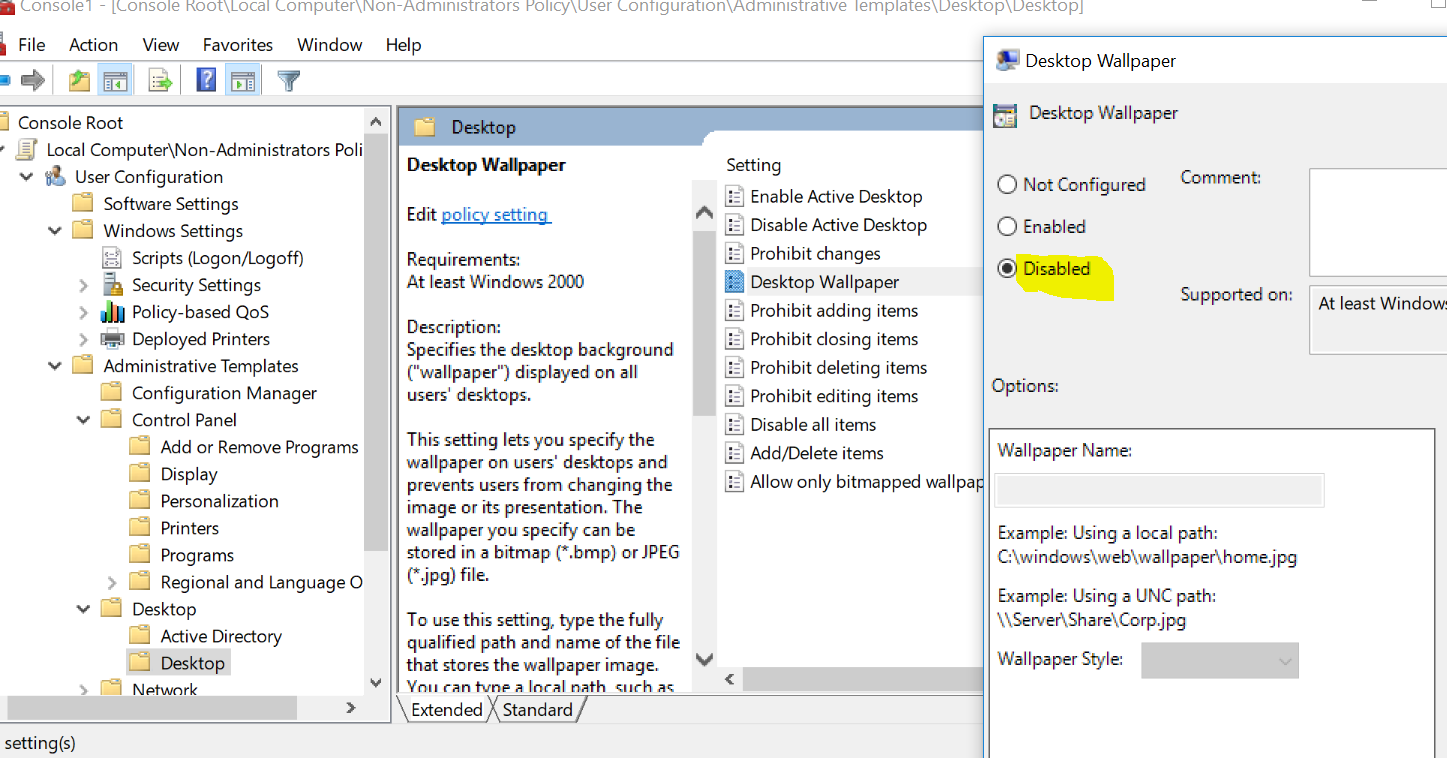
Multiple Local GPOs
Prior to Vista, there was only one configuration policy that applied to all users that logged onto that computer. A new feature is now available to allow for different user configurations for different users where we can decide to disable a certain GPO for a group of users.
To enable multiple local GPOs, from the client run MMC.EXE and run as an administrator. Then add Group Policy Object snap-in. Choose Users and then pick a user group. Browse to the policy, such as Corporate Wallpaper you’d like to NOT apply to these users and click Disable on the policy.
Starter GPOs
Starter GPOs are default templates that come with Group Policy or you can create on your own. They must first be enabled in Group Policy Management by clicking Create Starter GPOs Folder
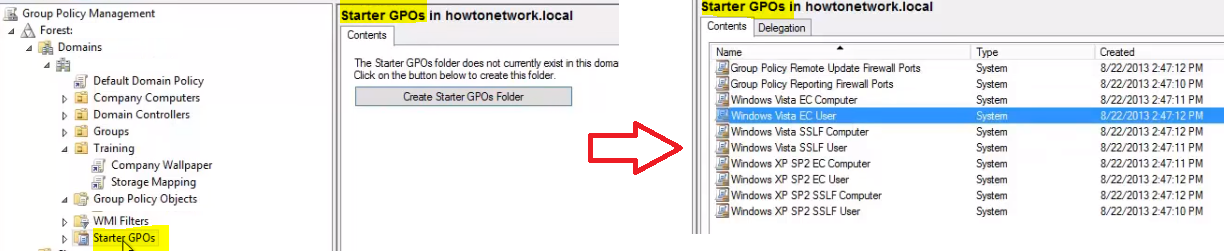
From here, you can right click a Starter GPO and select Create GPO from Starter GPO. By doing this, you are creating GPO based off this template. The most common use of a starter GPO is when you want a group of settings for a type of computer role.
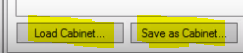
You can create new Starter GPOs simply by right clicking and selecting Create New Starter GPO. The process of configuring the Starter GPO is just like configuring a normal GPO. Finally, you can opt to import or export all of your Starter GPOs to migrate them to another domain, etc.
Delegating GPO Management
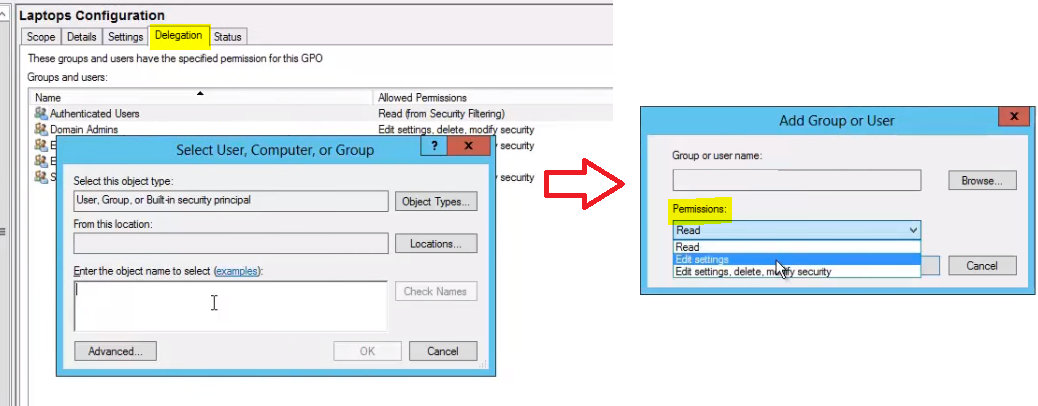
We can decide to delegate some of the Group Policy Management task to other users that do NOT need to be Domain Administrators. We do this by adding a User or Security Group to the delegation tab for the GPO we want to delegate permissions. We can select to allow them to have Read, Edit Settings, or Edit Settings, delete and modify security the GPO.
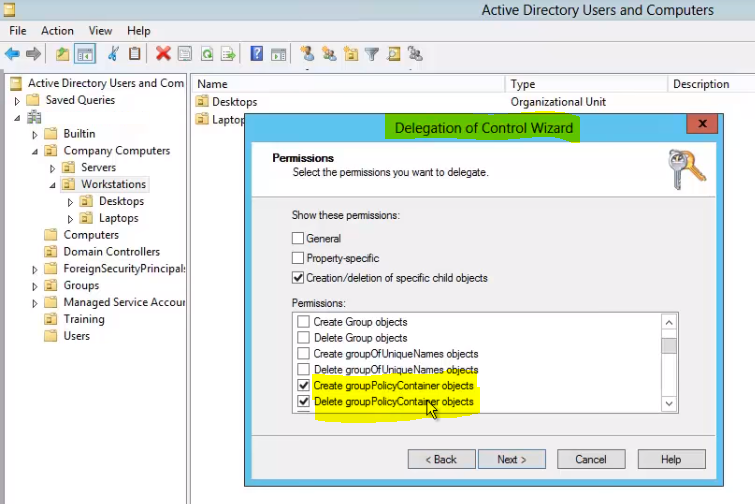
Delegation can also be managed through Active Directory Users and Computers on an OU level. This is accomplished by right clicking the desired OU and selecting, Delegate Control. This will bring up the wizard which will allow you to choose exactly who and how you want control delegated to objects containing within the OU:
Resultant Group Policy
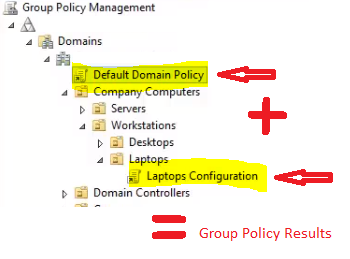
Group Policy Objects are cumulative in nature where all GPOs along the tree are added on top of each other to produce the results that are seen within a particular OU. In this example, the Default Domain Policy + Laptops Configuration Policy settings will all apply to the computers within the Laptop OU:
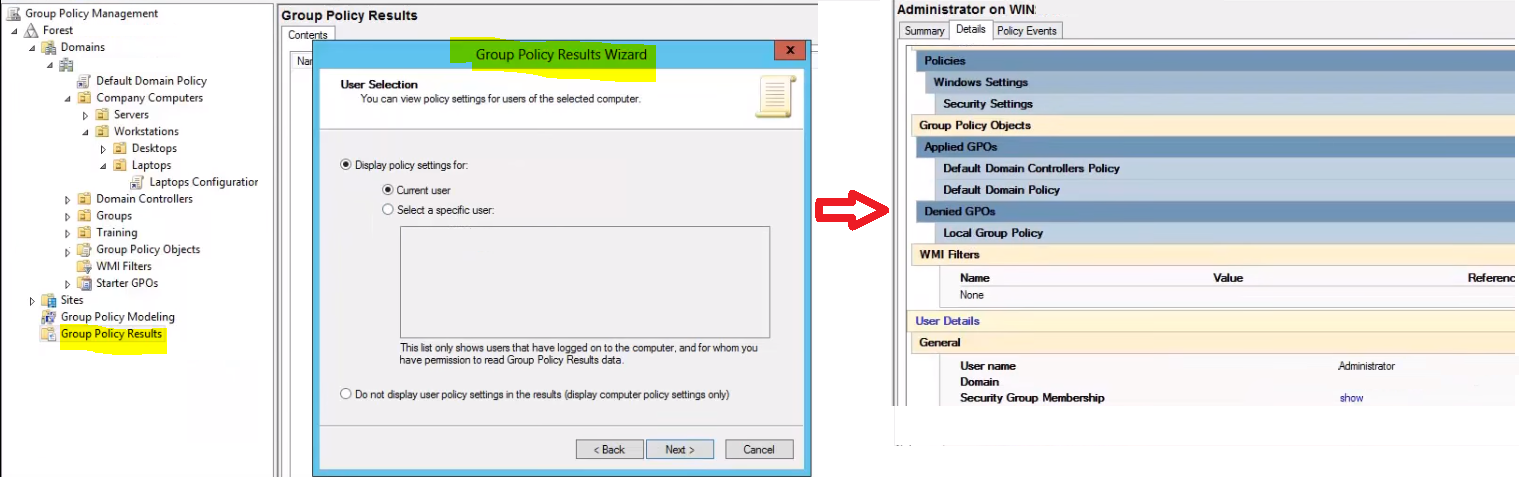
To see these results for yourself you can view them by right clicking Group Policy Results and selecting Group Policy Results Wizard. This will generate a results report where you can view all GPO results that apply to the target you chose in the Wizard.
You can also view the GPO results locally on a client computer. To view all the policies applied to the user account you’re currently logged in with, you would use the following command:
gpresult /Scope User /v
The /v argument in that command specifies verbose results, so you’ll see everything.
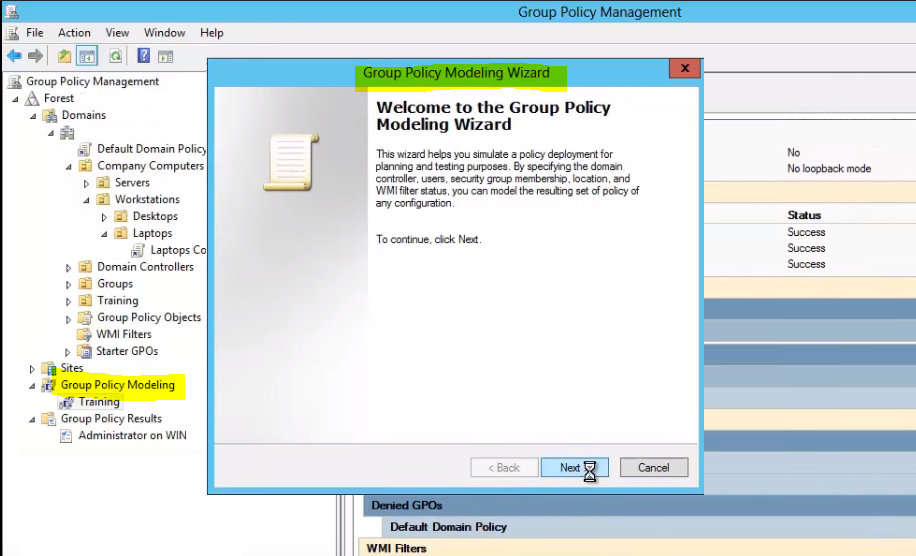
Group Policy Modeling
The Group Policy Modeling wizard is a tool that allows you to see the effects of a GPO for a specific user or computer account without actually having to apply it. Simply run the wizard and choose where, with what settings and who you’d like to simulate it against, and it will create a similar report to resultant group policy.
Group Policy Filtering
Using Group Policy Filtering will allow you to target Group Policy to better meet the needs of your environment by allowing you to target objects more specifically than just by OU.
The Problem with Applying Group Policy to OUs
If you consider a typical OU structure, we separate users and computers by things like departments, locations, etc.
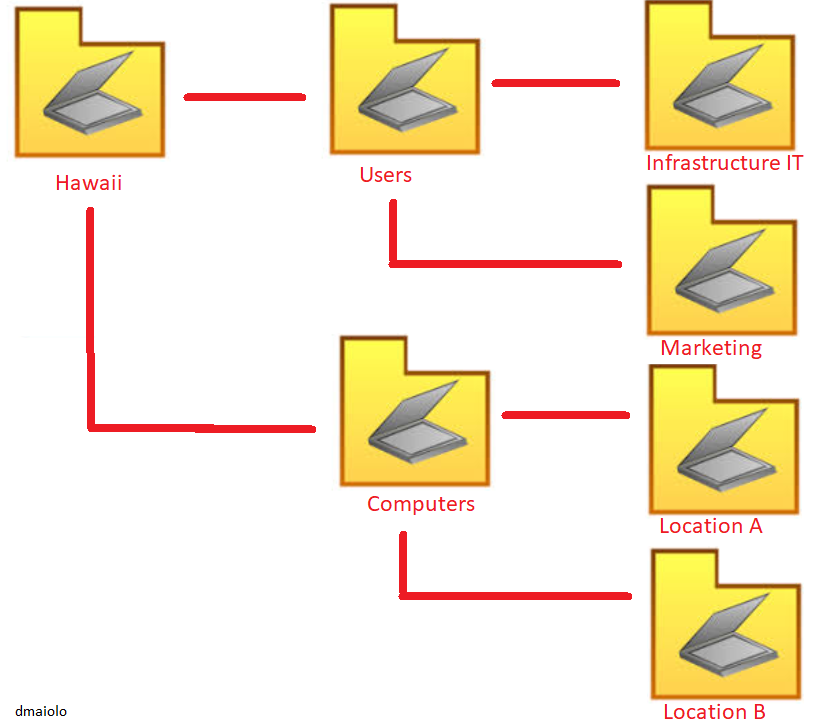
This type of structure works ok in most situations with Group Policy as all weed need to do is design the Group Policy depending on which OU it is linked to. However, the problem with this approach is that it requires you to sort all of the desired objects into Active Directory into the correct OU. On a large network you might have hundreds or thousands of objects that need to be sorted, so this can definitely become a problem.
For example, if you wanted to target computers belonging to Windows Server 2012 Operating Systems, you would need to manually move what OU each computer was in when it was upgraded from Server 2008. In this example, you might want to apply Group Policy to an Operating System by detecting it, and it is in this section we’ll look at different filtering techniques that will allow us to target Group Policies to users and computers without having to move objects around in Active Directory.
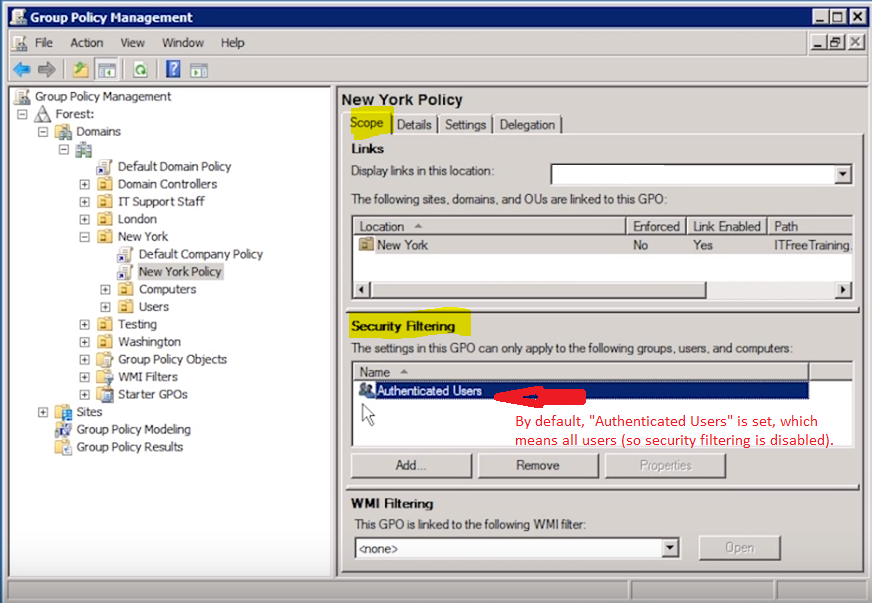
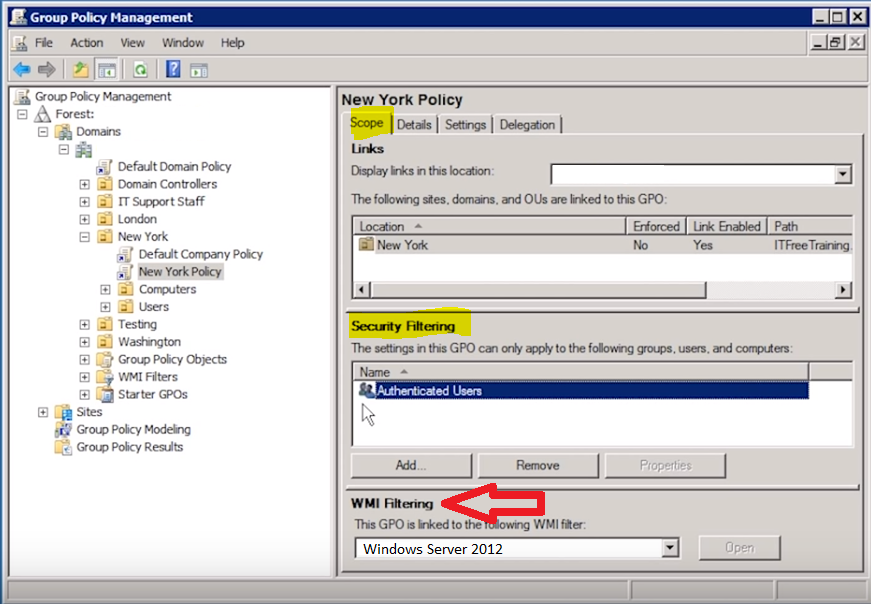
Security Filtering
The first type of filtering is Security Filtering. By default, this is disabled and you’ll notice that by seeing “Authenticated Users” listed in the filter, which simply means the policy will apply to all users authenticated by the domain, aka everyone. You can opt to Remove this group and choose your own group this will apply to. This is a great way of narrowing down who this Group Policy will be applied to.
WMI Filtering
Sometimes narrowing down by User or Group is simply not enough and we need something even more granular. In that case, we can filter down even further by using a WMI filter. For example, maybe we want to target a certain Operating System. To do this we create a new WMI Filter and write the filter in WQL, which we have already done in some of my other articles centered around WMI filtering in SCCM.
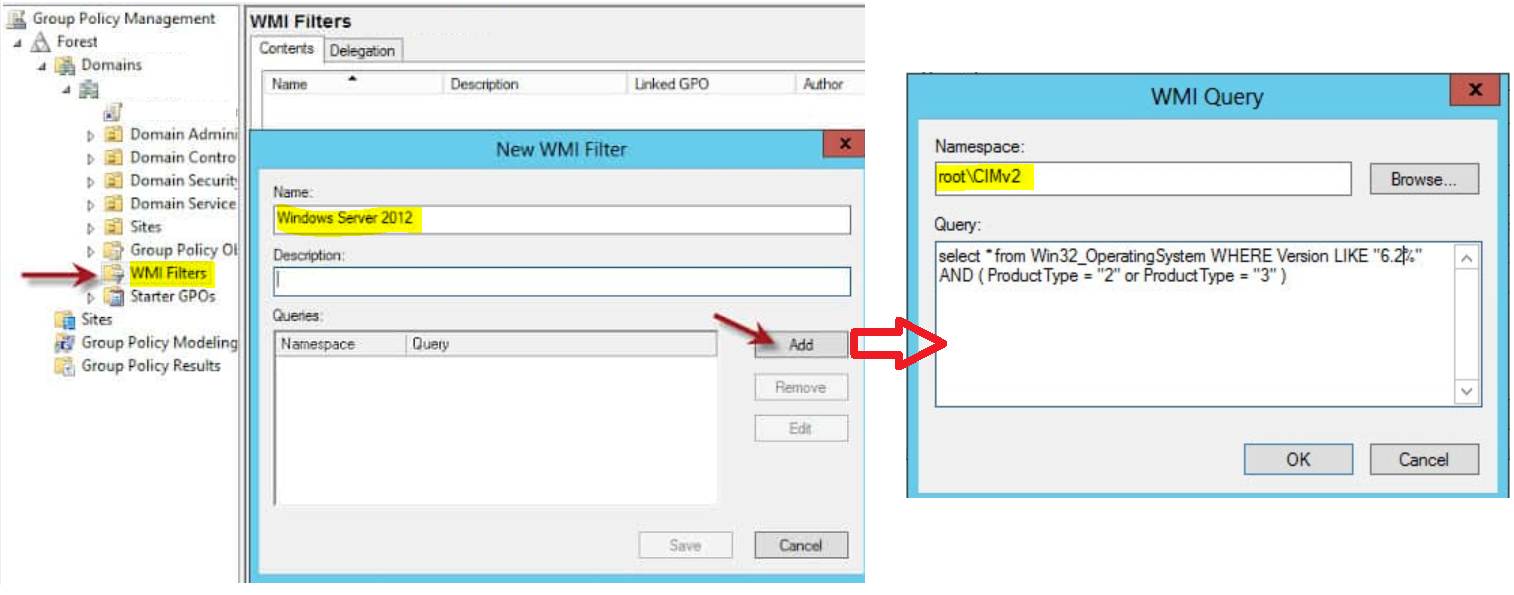
After we create the WMI filter, now we need to configure one or more GPOs to actually use the filter. At the bottom of the Scope tab in WMI Filtering we simply select the appropriate WMI filter. In this instance, now we will be filtering on computers within the New York OU that are Windows Server 2012 machines only.
You can create more complex WMI queries that could cover anything you might want to search for with a WMI query.

