Introduction to ISO in Photography
ISO, or the International Organization for Standardization, represents more than a set of guidelines; it embodies the alchemy of light sensitivity that transforms an image from a mere snapshot to a stirring narrative. For those embarking on the photographic journey, understanding ISO is like learning the language of light, allowing one to converse with shadows and highlights, crafting images that echo with emotion and clarity.
In the realm of photography, few elements are as pivotal to the craft as the understanding and manipulation of ISO. As a seasoned photographer and technology consultant, I’ve traversed the world, capturing not only the beauty of diverse landscapes but also the essence of moments, both monumental and minute. With a lens that has peered through the cultural windows of North Korea and the celestial gateways of astrophotography, my journey has been as much about capturing light as it has been about chasing the stories it unfolds.
Section 1: What is ISO?
At its core, ISO is a measure of a camera sensor’s sensitivity to light. It is a critical component in the exposure triangle, which also includes aperture and shutter speed, governing the brightness or darkness of a photograph. The ISO setting determines how quickly the sensor absorbs light; the higher the ISO number, the more sensitive it is and the less light is needed to achieve a given exposure. However, as the ISO increases, so does the grain or noise in the image, which can affect overall quality.
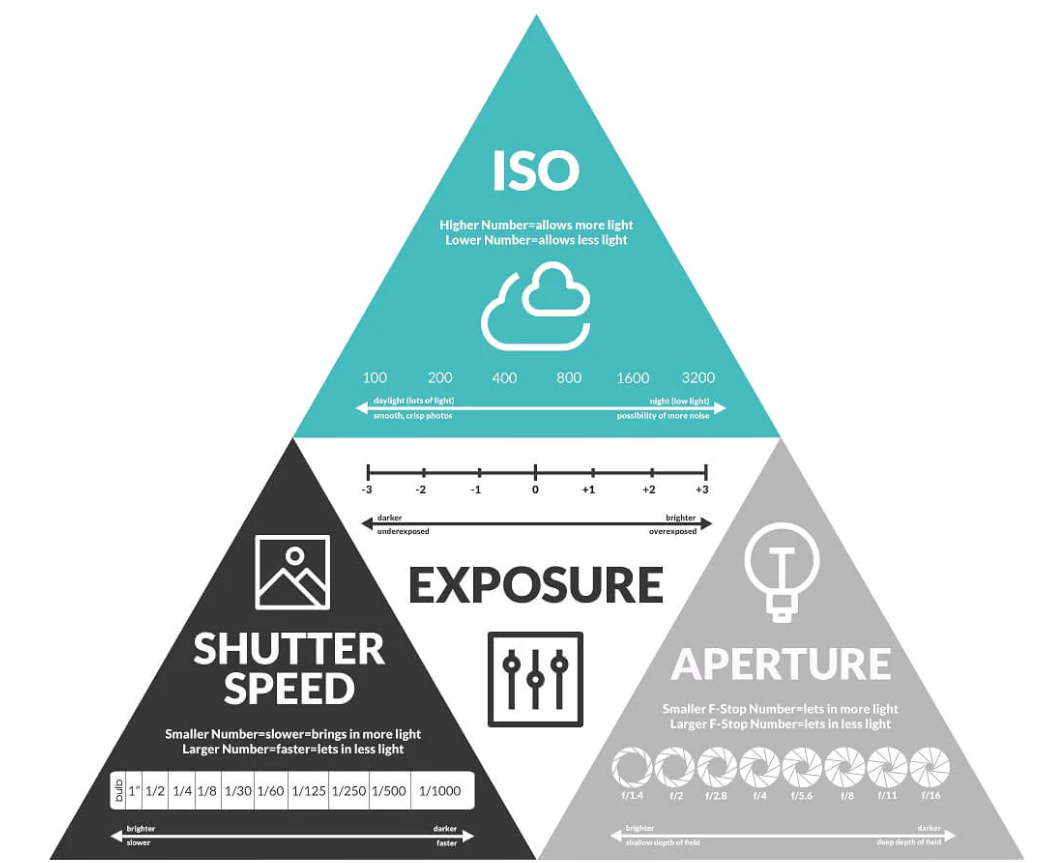
In the analog days, ISO (or ASA as it was previously known) was fixed by the film’s chemical composition. Today’s digital cameras allow photographers to adjust ISO settings on the fly, providing immense creative flexibility in various lighting conditions. ISO is instrumental in balancing the exposure triangle, especially in challenging light, enabling photographers to maintain their desired aperture and shutter speed without compromising on the scene’s natural ambiance.
Key Point Summary:
- ISO Definition: ISO denotes the camera sensor’s sensitivity to light, crucial for determining a photo’s exposure.
- Exposure Triangle: ISO works in tandem with aperture and shutter speed to create a well-exposed image.
- Flexibility: Modern digital cameras offer adjustable ISO settings, which can be changed according to the lighting conditions.
- Trade-off: Higher ISO levels increase light sensitivity but can introduce noise, potentially degrading image quality.
- Creative Control: Adjusting ISO allows photographers to preserve desired depth of field and motion capture settings, even in low light scenarios.
Section 2: What is the Meaning of ISO?
ISO stands for the “International Organization for Standardization,” a body that develops and publishes international standards, including those that apply to film and digital camera sensitivity. The term ‘ISO’ itself, rather than being an acronym, is derived from the Greek word ‘isos’, meaning ‘equal’. This symbolizes the uniformity of standards across different industries and countries.
The historical context of ISO in photography is deeply intertwined with the evolution of film. The standards for measuring the sensitivity of film to light were first set by the American Standards Association (ASA) and later by the German standards body, Deutsches Institut für Normung (DIN). In 1974, the ISO established an international standard for camera film sensitivity, which combined the ASA and DIN scales into a single unified system. This allowed photographers around the world to have consistent expectations of how a particular film would perform under specific lighting conditions.
With the advent of digital photography, the ISO standard was adapted to apply to the sensitivity of digital camera sensors, maintaining continuity with the film standards to ease the transition for photographers.
Timeline:
- 1930s-1950s: Separate ASA and DIN standards are in use, indicating film speed.
- 1974: ISO establishes a combined standard for film sensitivity, merging ASA and DIN into one system.
- 1980s-1990s: The ISO film speed standard becomes universally adopted by photographers and film manufacturers.
- Early 2000s: Digital photography emerges, and ISO standards are adapted for digital camera sensors.
- Today: ISO continues to be a critical setting in digital cameras, reflecting sensor sensitivity and influencing image quality in all lighting conditions.
Section 3: Common ISO Values
ISO values are standardized numbers that indicate the sensor’s sensitivity to light. These values double as they increase, with each increment representing a doubling of sensitivity (and thus a doubling of brightness, under the same shooting conditions). Here is a list of common ISO values that you’ll encounter on most cameras:
- ISO 100
- ISO 200
- ISO 400
- ISO 800
- ISO 1600
- ISO 3200
- ISO 6400
Each step between these values represents a one-stop increase or decrease in brightness, assuming all other factors like aperture and shutter speed remain constant. This is similar to ‘stops’ in exposure, where each stop represents a doubling (increase) or halving (decrease) in the amount of light that reaches the sensor.
| ISO Value | Relative Brightness | Typical Shooting Scenario |
|---|---|---|
| 100 | Base sensitivity | Bright sunlight, outdoor scenes |
| 200 | 2x base sensitivity | Overcast days, shade |
| 400 | 4x base sensitivity | Indoor lighting, late afternoon |
| 800 | 8x base sensitivity | Low-light interiors, sunsets |
| 1600 | 16x base sensitivity | Dusk, poorly lit events |
| 3200 | 32x base sensitivity | Night scenes, concerts |
| 6400 | 64x base sensitivity | Extreme low light, astrophotography |
The progression from ISO 100 to ISO 6400 illustrates the increasing sensitivity and potential for shooting in progressively lower light levels, but also the increase in noise that may be introduced into the image as a result.
Section 4: What is Base ISO?
Base ISO is the lowest ISO setting at which your camera sensor can produce the highest quality image without adding noise. It is the starting point of your camera’s ISO range and provides the optimal balance between noise and detail in an image. The base ISO is typically ISO 100 for most cameras, although some models may have a base ISO of 64 or even lower.
The importance of base ISO lies in its role as the ‘sweet spot’ for image quality. At this setting, you can achieve the crispest detail with the least amount of noise, which is why it’s preferred, especially in well-lit conditions. When light is plentiful, staying at base ISO ensures that the clarity and color fidelity of your photographs are at their peak.
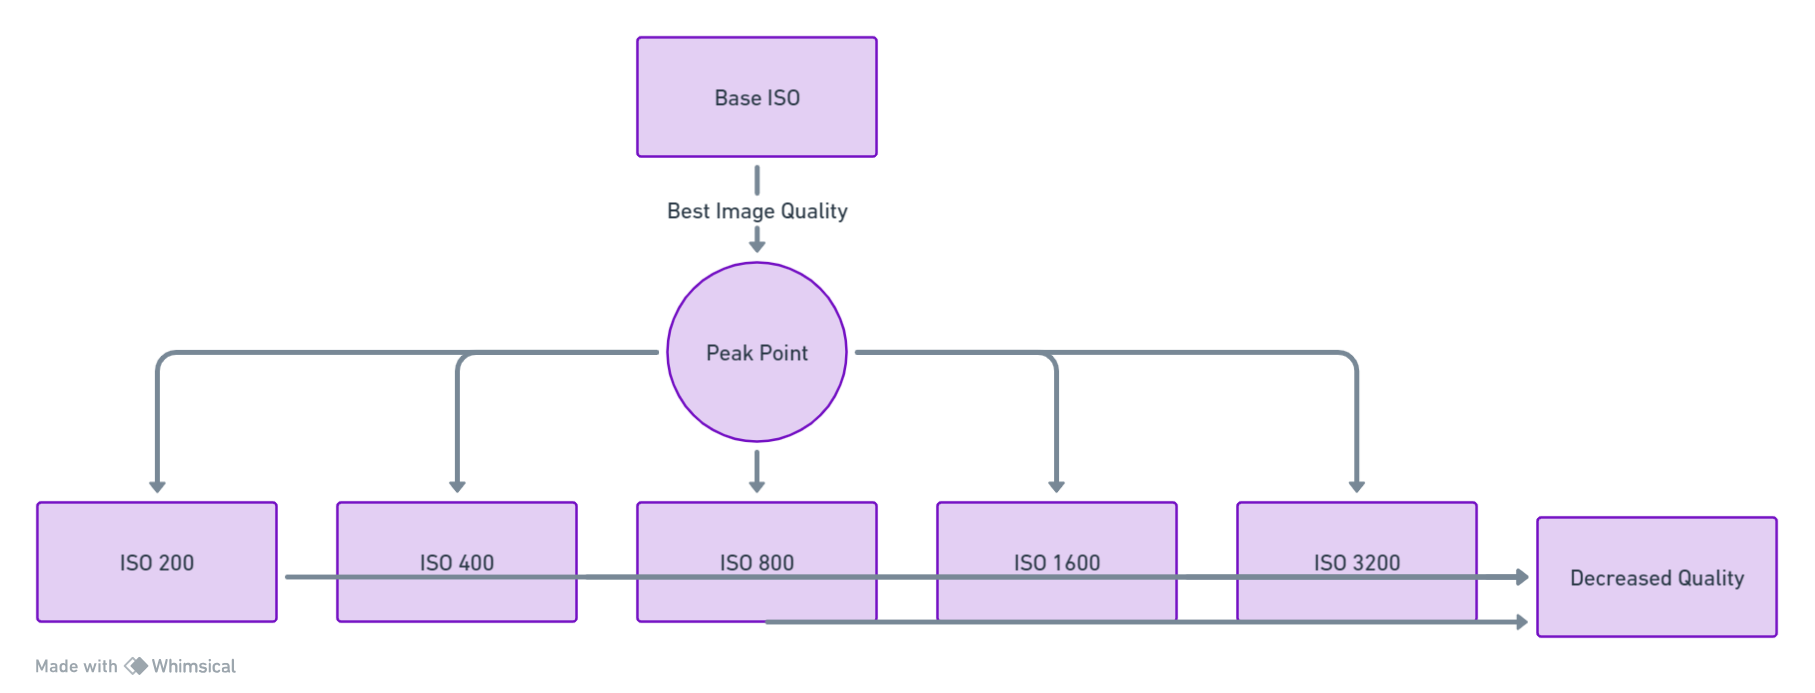
This diagram shows that as you move away from the base ISO, the noise level increases, which can degrade the image’s quality. However, it is also important to note that modern cameras have made significant advancements in noise reduction at higher ISO levels, allowing for greater flexibility in various lighting conditions without a substantial compromise in image quality.
Section 5: Low vs High ISO Noise Visibility
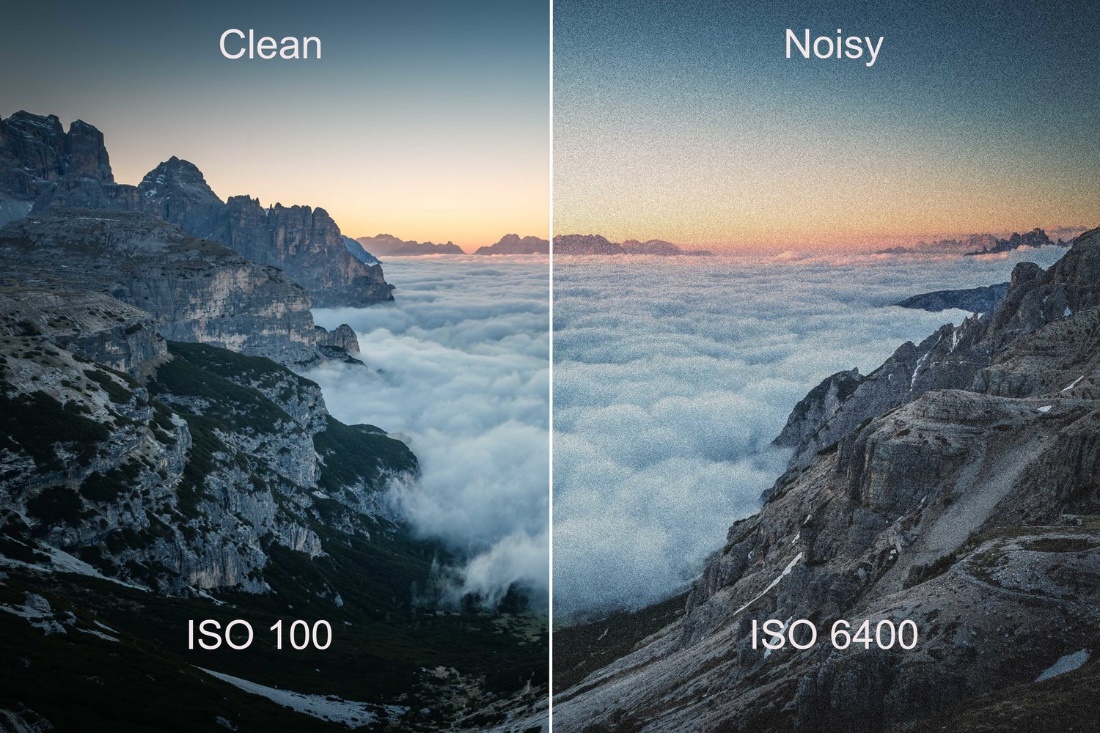
In photographic terms, ‘noise’ refers to the grainy or speckled appearance that can occur in images, particularly noticeable in uniform areas like blue skies or shadows. Noise is directly influenced by the ISO setting: lower ISO values typically yield cleaner images with less noise, while higher ISO values increase noise visibility.
The choice between low and high ISO settings is often a balancing act between the amount of light available, the desired depth of field, the shutter speed required to freeze motion, and the tolerance for noise in the final image. Understanding this balance is crucial for photographers to make informed decisions that align with their creative vision.
Section 6: How to Change ISO
Changing the ISO setting on your camera allows you to adapt to different lighting conditions and control the quality of your images. While the exact method may vary slightly depending on the camera model, the general process is similar across most digital cameras. Here is a step-by-step guide using bullet points:
- Turn on Your Camera: Ensure that your camera is on and ready to be adjusted.
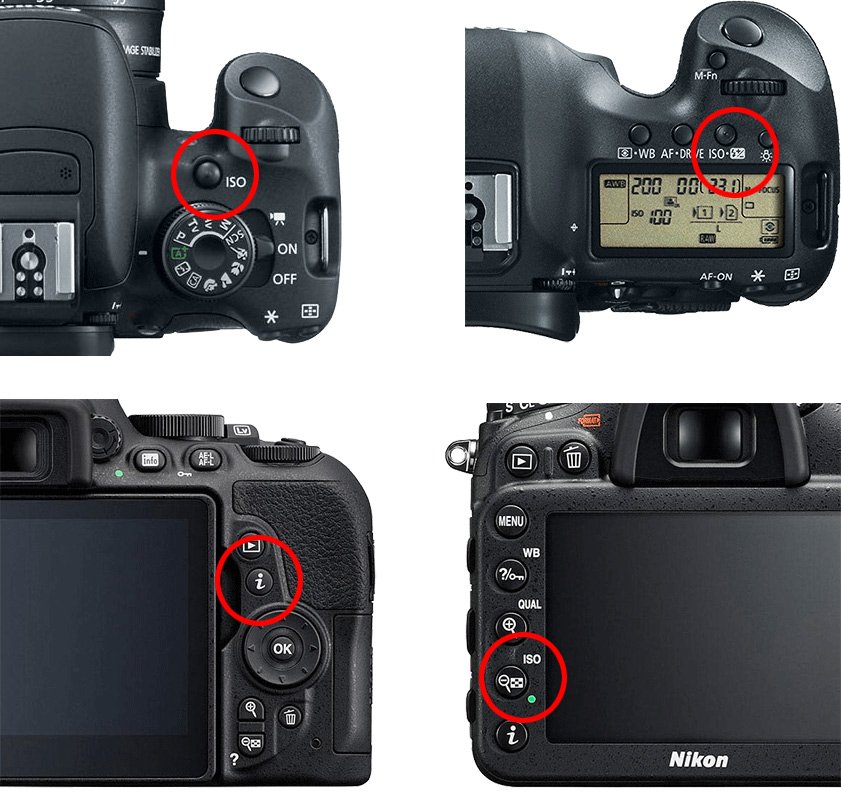
- Access ISO Settings: Look for a button on your camera labeled ‘ISO’ or access the ISO setting through the camera menu.
- On some cameras, ISO can be changed via a dedicated ISO button.
- On others, you might need to press a ‘Menu’ or ‘Function’ button and navigate to the ISO setting.
- Select ISO Value: Once in the ISO settings, use the camera’s dial, touchscreen, or arrow keys to select the desired ISO value.
- Some cameras have an ‘Auto ISO’ function that can be selected here, allowing the camera to adjust ISO automatically based on lighting conditions.
- Confirm Selection: After choosing your ISO, press ‘Set,’ ‘OK,’ or simply half-press the shutter button (depending on your camera model) to confirm the selection and return to shooting mode.
- Test the Settings: Take a test photograph to ensure the ISO setting is appropriate for your lighting conditions. Review the image and adjust the ISO if necessary.
Section 7: What Camera ISO Should You Use?
Using the appropriate ISO setting for different scenarios is key to achieving the best possible image quality. Here is a conceptual table that presents common scenarios with suggested optimal ISO settings:
| Scenario | Optimal ISO Setting | Notes |
|---|---|---|
| Bright sunny day outdoors | ISO 100 | Base ISO to capture the most detail with minimal noise. |
| Indoor with good artificial light | ISO 400-800 | Balance between noise and exposure without flash. |
| Overcast day or in the shade | ISO 200-400 | Slightly higher ISO to compensate for reduced lighting. |
| Sunset or sunrise | ISO 800-1600 | Higher ISO to capture details in low light without blur. |
| Indoor sports or concerts | ISO 1600-3200 | High ISO to freeze motion in low light, expect some noise. |
| Nighttime or astrophotography | ISO 3200 and above | Highest ISOs to capture details in very low light. |
Section 8: When to Use Low ISO
Ideal conditions for low ISO usage include:
- Shooting in bright outdoor environments.
- Capturing detailed landscapes.
- Photographing portraits where skin tone and texture are important.
- When using a tripod that allows for longer exposure times without camera shake.
- Situations where the highest image quality with the least noise is desired.
Section 9: When to Use High ISO
Real-life examples where high ISO is beneficial:
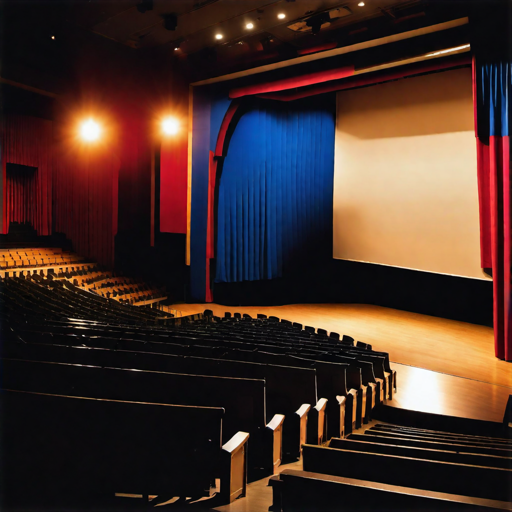
- Taking photos of a school play in a dimly lit auditorium to avoid motion blur without using flash.
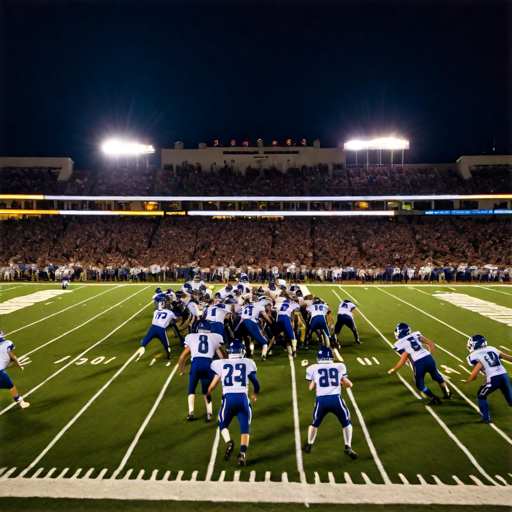
- Capturing the action at an evening football game where lighting is suboptimal, and you need a fast shutter speed.
- Photographing nocturnal wildlife where the use of artificial light is either impossible or would disturb the animals.
Practical advice when using high ISO:
- Always test your camera’s limits in various conditions to understand how high you can push the ISO before noise becomes unacceptable for your purposes.
- Use noise reduction software in post-processing to mitigate the effects of noise in high ISO images.
- Remember that a noisy photo is often better than a blurry one; don’t be afraid to use high ISO when the situation calls for it.
- When possible, use the lowest ISO you can get away with for the given lighting condition to maintain image quality.
Section 10: Minimizing Noise and Maximizing Image Quality
To ensure that your images have the highest quality with minimal noise, follow these steps:
- Use Base ISO: Whenever possible, use the base ISO of your camera to start with the highest image quality.
- Stabilize Your Camera: Use a tripod or other stable surfaces to allow for longer exposures at lower ISOs without camera shake.
- Maximize Natural Light: Shoot in well-lit conditions or enhance the scene’s lighting to keep the ISO as low as possible.
- Wide Aperture: Use a lens with a wide aperture to allow more light to reach the sensor, permitting a lower ISO.
- Slow Shutter Speed: Where subject movement is not an issue, use a slower shutter speed to reduce the need for higher ISO settings.
- Post-Processing: Utilize noise reduction software judiciously to reduce the visibility of noise without compromising detail.
Comparative Table Concept:
| Setting | Low ISO Advantages | High ISO Advantages | Shutter Speed Trade-off | Aperture Trade-off |
|---|---|---|---|---|
| Low ISO (100) | Maximum image quality, minimal noise | – | May require slower shutter speed, risk of motion blur | Allows for narrower aperture for greater depth of field |
| High ISO (3200+) | – | Allows for faster shutter speeds to freeze motion | Less risk of motion blur | Permits wider aperture for low light conditions |
Section 11: Common ISO Myths and Misconceptions
Q: Higher ISOs always result in bad image quality, right?
A: Not necessarily. While higher ISOs can introduce noise, modern cameras handle high ISOs much better, and sometimes the trade-off for a well-exposed shot is worth it.
Q: Shouldn’t I just leave the camera on Auto ISO all the time?
A: Auto ISO can be useful, but for full creative control, manually adjusting ISO in response to your lighting conditions is often preferable.
Q: Is ISO the main determinant of image quality?
A: No, ISO is just one part of the exposure triangle that affects image quality. The lens quality, sensor size, and post-processing also play significant roles.

- ISO Invariance: Some modern cameras have sensors that are ‘ISO invariant’, meaning that there is little to no penalty in noise when brightening an image taken at low ISO in post-processing compared to raising the ISO in the camera.
- ISO and Sensor Size: Larger sensors generally produce less noise at higher ISOs compared to smaller sensors, all else being equal.
- Digital ISO: Unlike film, digital ISO does not change the sensitivity of the sensor itself but rather amplifies the signal it produces.
Section 12: Conclusion
In the intricate ballet of light and shadow that is photography, ISO serves as a fundamental step in choreographing the final image. We’ve explored its definition, historical context, and the nuanced understanding required to wield it effectively. From the lowest base ISO, which offers pristine image quality in ample lighting, to the high ISO settings that allow photographers to capture moments in less-than-ideal lighting conditions, ISO is an indispensable tool in a photographer’s arsenal.
Remember, the choice of ISO is a balancing act—higher ISOs offer flexibility in low light but at the potential cost of increased noise, while lower ISOs ensure the highest image quality with minimal noise. Modern cameras have advanced noise-reduction capabilities, allowing for higher ISO use than ever before without significantly compromising image quality. Post-processing too plays a pivotal role in maximizing image quality, offering ways to mitigate the noise introduced at higher sensitivities.
As we conclude this exploration, it is clear that ISO, much like the aperture and shutter speed, is a creative choice. Each setting opens new avenues for expression and should be chosen with intent. The key is to understand the trade-offs and to make informed decisions that align with your creative vision.
I invite you to further this dialogue. Share your experiences, your successes, and the challenges you’ve faced with ISO. Do you have a particular setting you swear by in certain lighting conditions? Perhaps a trick to handle noise that you’ve found invaluable? Or maybe a question that’s been lingering in your mind about ISO? The comment section below is open for your insights, inquiries, and discussions. Let’s continue to learn from each other and push the boundaries of what we can achieve with our cameras. Your contributions are not just welcome; they are essential to the collective growth of our photographic community.

