In the realm of photography, composition is not merely a set of rules; it is the very heartbeat of visual storytelling. As I embark on the exploration of this art form, let us delve into the essence of composition, a skill that transformed my journey from a fledgling photographer to a professional, and now, as an AI and IT consultant, intertwines with my mastery of technology to capture life’s intricate tapestries.
The art of composition is akin to a symphony, where each element is a note contributing to a grand musical score. It is where the science of geometry meets the intangibles of aesthetics, creating images that resonate with harmony and emotion. My transition from the founder of Stony Studios in New Zealand to leading DBGM Consulting Inc. in NYC, emphasizes that composition is not confined to photography alone but is a universal principle that enhances clarity and impact in any visual domain.
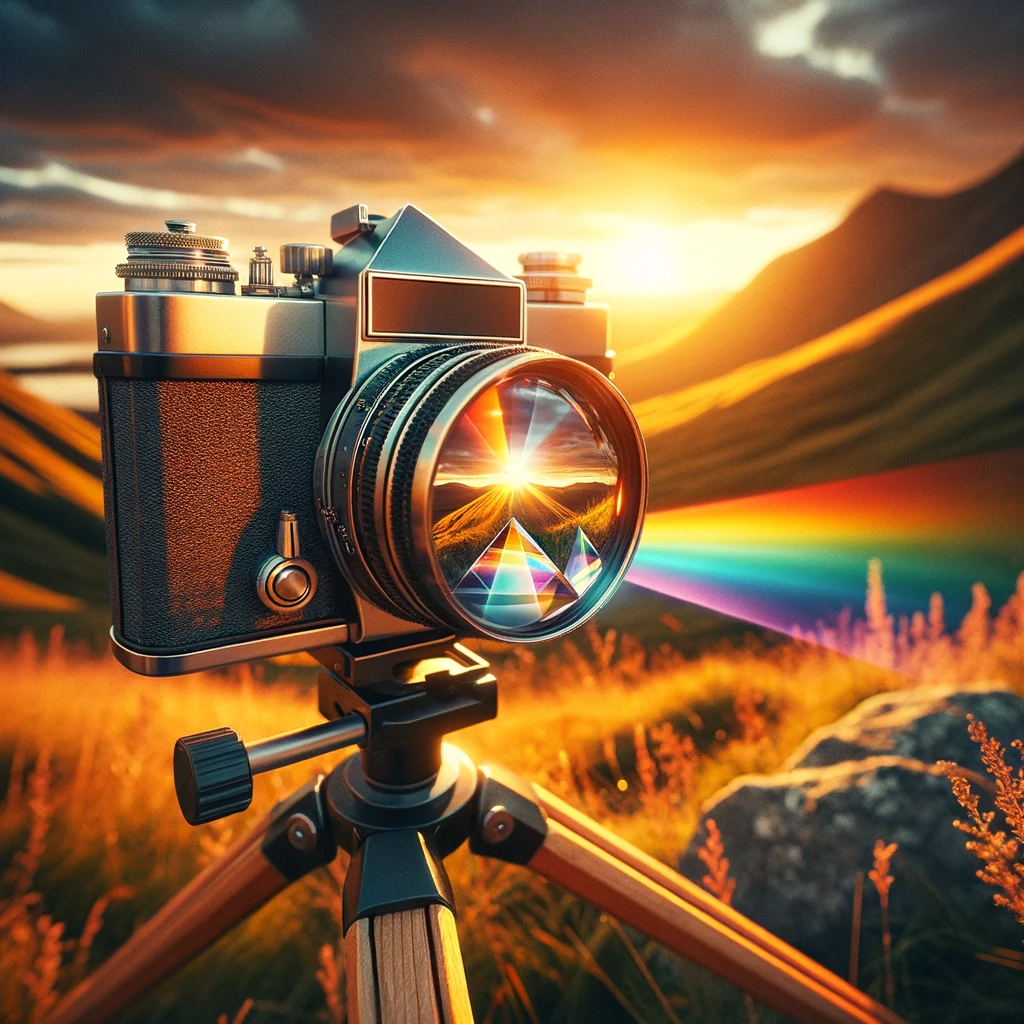
My journey through the lenses of Canon cameras, from the EOS 5D series to the L series lenses, has been as much about capturing images as it has been about composing life’s moments. The photographs I’ve taken—whether it was chronicling the solemnity of government functions in North Korea or encapsulating the vibrancy of weddings—each frame was a conscious decision, a moment distilled into its purest form through the lens of intention and balance.
In this article, we will navigate the rich tapestry of composition—defining its parameters, understanding its power, and mastering its elements. We will break down the complexity of this art into tangible steps, contrast simplified and complex compositions, and highlight the symbiosis of positive and negative space. Through galleries of images, advanced techniques, and real-world applications, this guide will serve as a compass for both novices and veterans in photography.
As we proceed, I will share insights from my globetrotting experiences, from the rugged terrains of Antarctica to the bustling streets of Cairo, and how these have shaped my understanding of composition. We will also explore how artificial intelligence, with tools like Dall-E and Midjourney, are reshaping the creative landscape, offering a fusion of art and technology that continues to redefine the boundaries of photography.
Join me on this voyage of discovery, where each photograph is not just seen but felt, where each composition tells a story waiting to be unraveled. Welcome to the art of composition in photography—a gateway to seeing the world through a lens of purpose and creativity.
Defining Composition
What is Composition?
Composition in photography is the deliberate arrangement of visual elements within the frame to convey meaning, emotion, and narrative. It’s the way a photographer organizes subjects, shapes, lines, and light to create a harmonious and impactful image. Good composition directs the viewer’s eye across the image and highlights the central subjects, creating a sense of balance and intention.
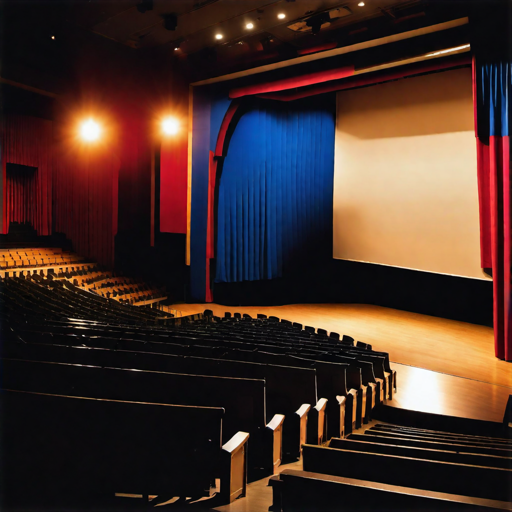
To illustrate, imagine a photograph as a stage and the elements within it as actors. Composition is the director’s instructions—where each actor stands, how the lighting falls, and when the actors move. The goal is to create a scene that captivates the audience, telling a story without words.
Components of Composition:
- Rule of Thirds: Divides the frame into nine equal segments, creating reference points that are aesthetically pleasing.
- Leading Lines: Uses natural or artificial lines to draw the viewer’s eye towards the main subject.
- Symmetry and Patterns: Involves using repetitive elements to create a visually pleasing and balanced image.
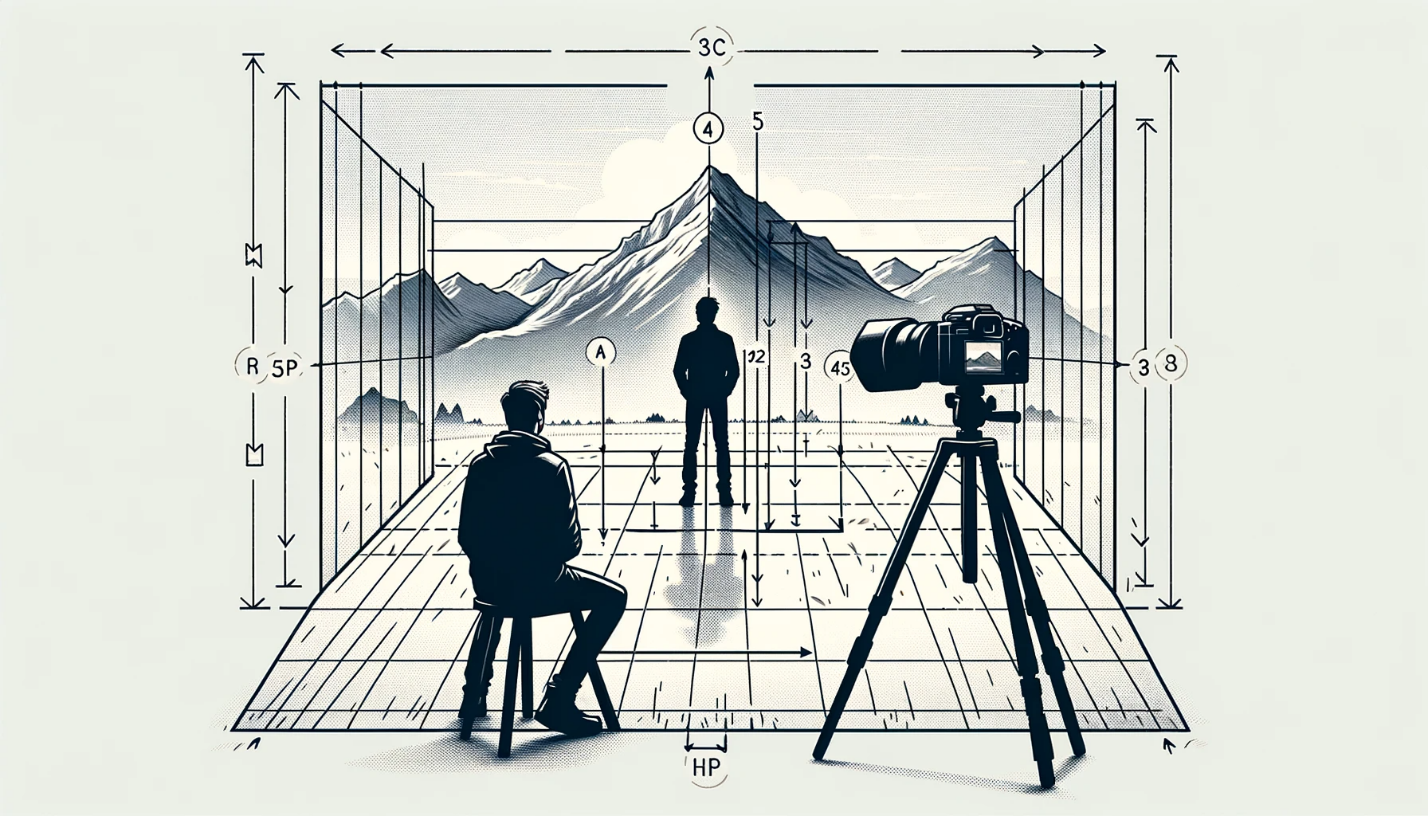
- Depth: Adds dimension to photographs, giving a sense of scale and complexity.
- Framing: Uses environmental elements to enclose the main subject, focusing attention.
- Negative Space: The area that surrounds the main subject, helping to define and emphasize it.
- Color and Light: Utilizes hues and light to enhance mood and guide the viewer’s eye.
The Power of Composition
The power of composition lies in its ability to transform a photograph from a mere snapshot to a compelling image that evokes emotion and tells a story. It’s the difference between a cluttered, confusing picture and one that’s clear, focused, and aesthetically pleasing.
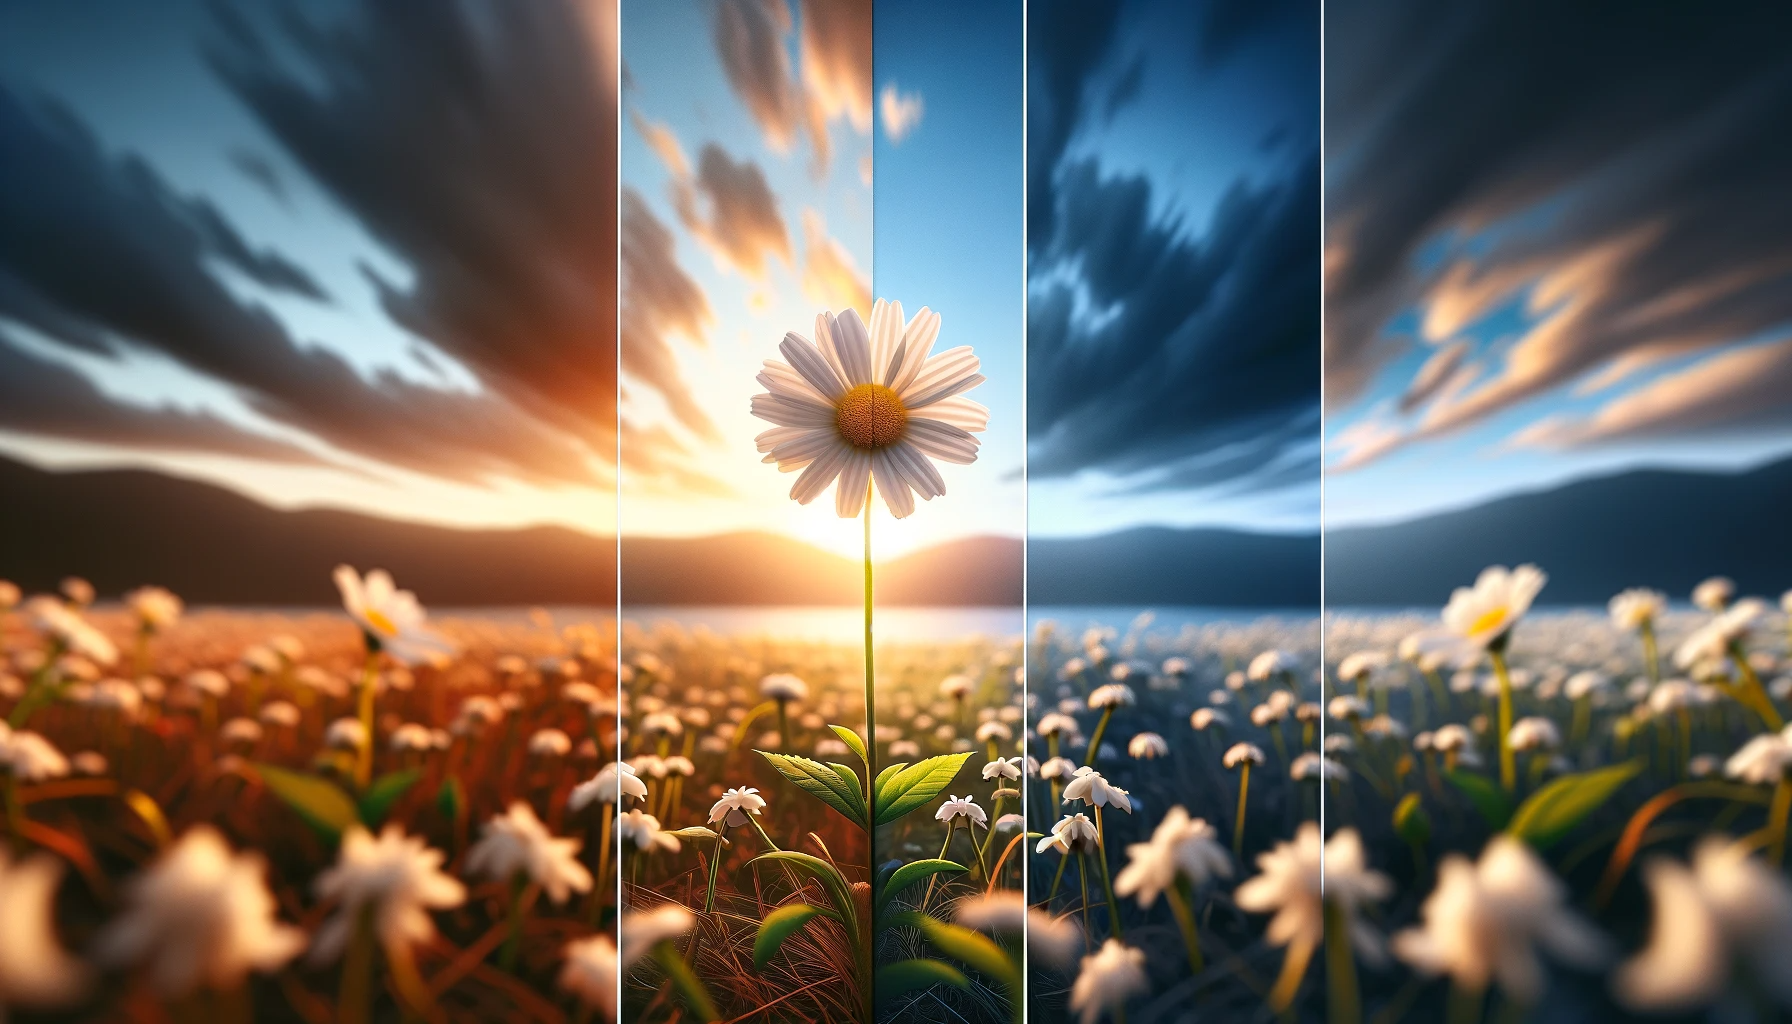
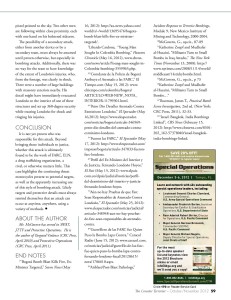
For instance, a photograph of a tree in a field can be simple or breathtaking, depending on composition. By changing the position of the tree within the frame, adjusting the angle to include leading lines from a fence, and capturing during golden hour for dramatic lighting, the photographer harnesses the power of composition to create an image that is not just seen, but felt.
| Component | Description | Example in Use |
|---|---|---|
| Rule of Thirds | Dividing the frame into thirds to place subjects | A horizon line placed on the bottom third of a frame |
| Leading Lines | Lines leading to the subject | A road winding towards a mountain |
| Symmetry | Balanced elements in frame | A reflection of trees in still water |
| Depth | Layering elements to create three dimensions | A flower in the foreground with mountains behind |
| Framing | Using elements to enclose the subject | A window framing a subject outside |
| Negative Space | Empty space around the subject | A lone tree with a vast sky backdrop |
| Color and Light | Use of colors and light to set mood | Warm sunset colors providing a backdrop for silhouettes |
To visualize the impact of composition changes, a before-and-after image is highly effective. For example, this ‘before’ shows a landscape with the subject lost in the clutter of the surroundings. Can you tell which boat I am trying to show you? The ‘after’ image, with improved composition, shows the subject repositioned according to the Rule of Thirds, with a clear foreground and background, giving the subject prominence and the overall image more depth.
Before

After

Deep Dive into Elements of Composition
Intent
To achieve intentional composition, follow these steps:
- Define the Purpose: Decide what you want to communicate with your photograph. Is it a feeling, a story, a moment, or a particular subject?
- Identify the Subject: Clearly determine what the main subject of your image is.
- Consider the Background: Look for a background that won’t distract from your subject, but that complements it.
- Plan Your Angle: Choose an angle that provides the best perspective on your subject. This could mean shooting from above, below, or head-on.
- Think About Lighting: Decide how the light should fall on your subject. Consider the time of day and the direction of natural light.
- Arrange the Elements: Position the elements in the frame to lead the viewer’s eye to your subject.
- Evaluate and Adjust: Take a test shot, review it, and adjust your composition as needed.
Simplicity
Contrasting Complex vs. Simplified Compositions:
| Complex Composition | Simplified Composition |
|---|---|
| Multiple subjects clutter the frame. | A single, clear subject is present. |
| Distracting background elements. | Clean background that doesn’t distract. |
| No clear focal point. | A well-defined focal point. |
| Conflicting patterns and textures. | Harmonious patterns and textures. |
| Overwhelming colors. | A controlled color palette. |
Balance
Tips for Achieving Balance:
- Symmetry: Use symmetry to create a sense of order and stability.
- Color: Balance bright or warm colors with neutral tones or cooler colors.
- Size and Scale: Counterbalance large subjects with several smaller ones.
- Texture and Pattern: Mix intricate patterns with solid areas for visual variety.
- Alignment: Align elements along a grid to provide structure to your composition.
Breathing Space
Picture breathing space by starting with a crowded frame and gradually removing elements until the subject has ample space around it, illustrating the subject’s isolation and importance.
What leaf would you like to highlight to your viewer?

Positive and Negative Space
| Positive Space (Subject) | Negative Space (Background) |
|---|---|
| A bird in flight against the sky. | The expansive sky around the bird. |
| A vibrant flower with dew drops. | The leafy green backdrop. |
| A sharply focused portrait. | The blurred or empty space around the person. |
What is the positive and negative space in this photo?

Patterns and Relationships
A brick wall with a single colored brick, highlighting uniformity and anomaly.

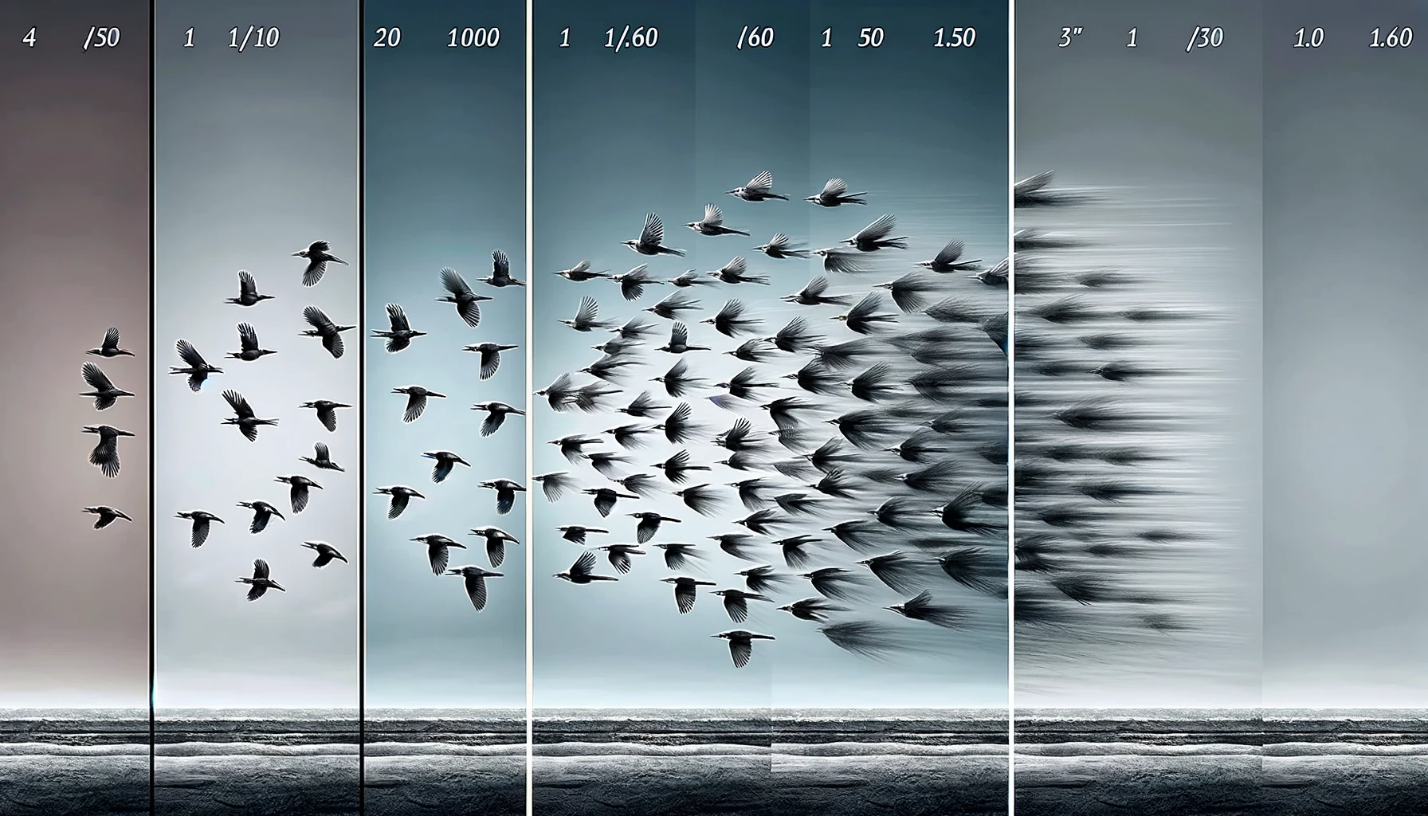
A flock of birds, emphasizing movement and directionality.

Architectural details where repeating windows create rhythm and flow.

These elements of composition serve as building blocks for photographers to construct visually compelling images. Whether capturing the grandeur of landscapes or the intimacy of portraits, a deep understanding of these principles can elevate the artistry of the captured scenes.
Advanced Composition Techniques
In advancing the craft of photography, embracing more complex composition techniques allows a photographer to create images with depth, intrigue, and a strong narrative. Here are several sophisticated methods, each with a conceptual framework that could be visualized through demonstrative images and analysis:
Layering: This technique involves placing elements at various distances from the camera to create a multi-dimensional scene.

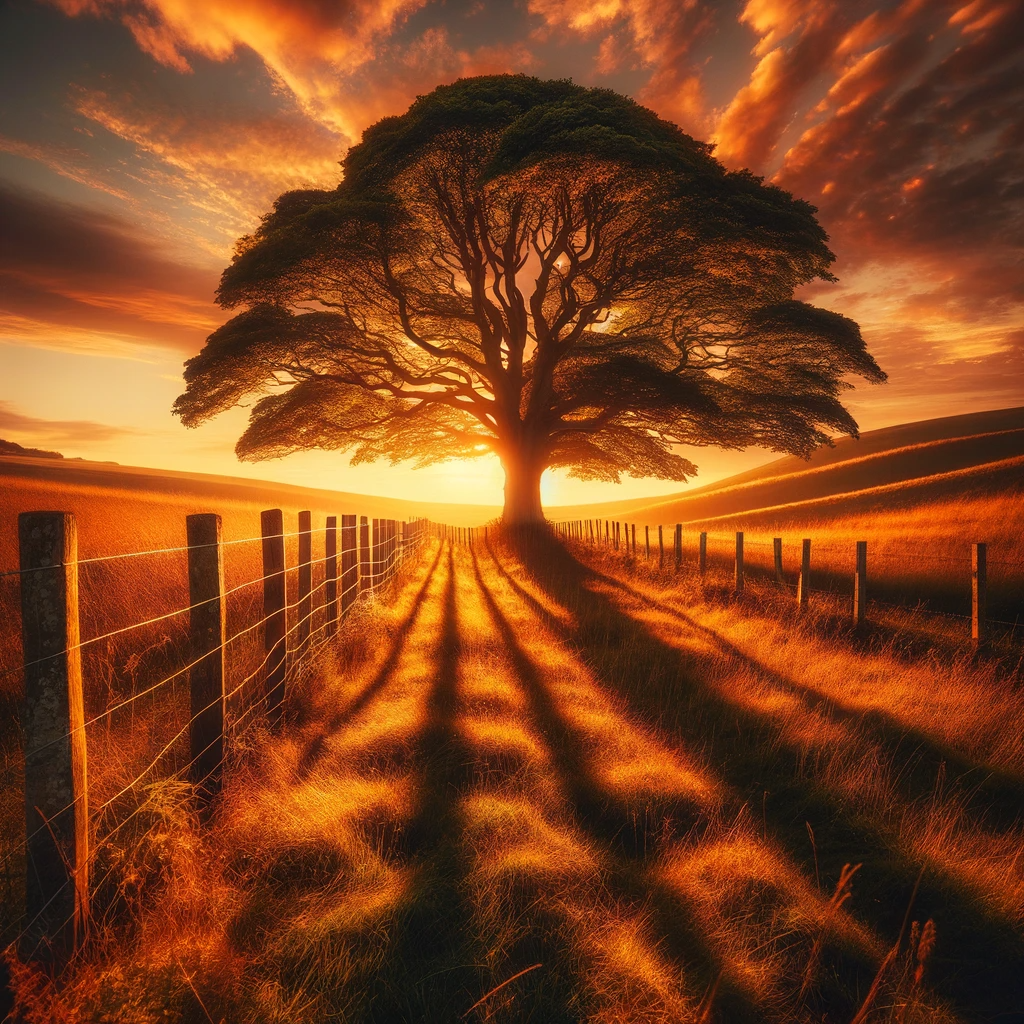
Juxtaposition: By placing contrasting elements side by side, photographers can tell a compelling story or highlight particular aspects of their subject. You could try this by including an old building next to a new skyscraper, or a portrait of a person in traditional attire against a backdrop of modern city life, highlighting the contrast between the old and the new, tradition and modernity.
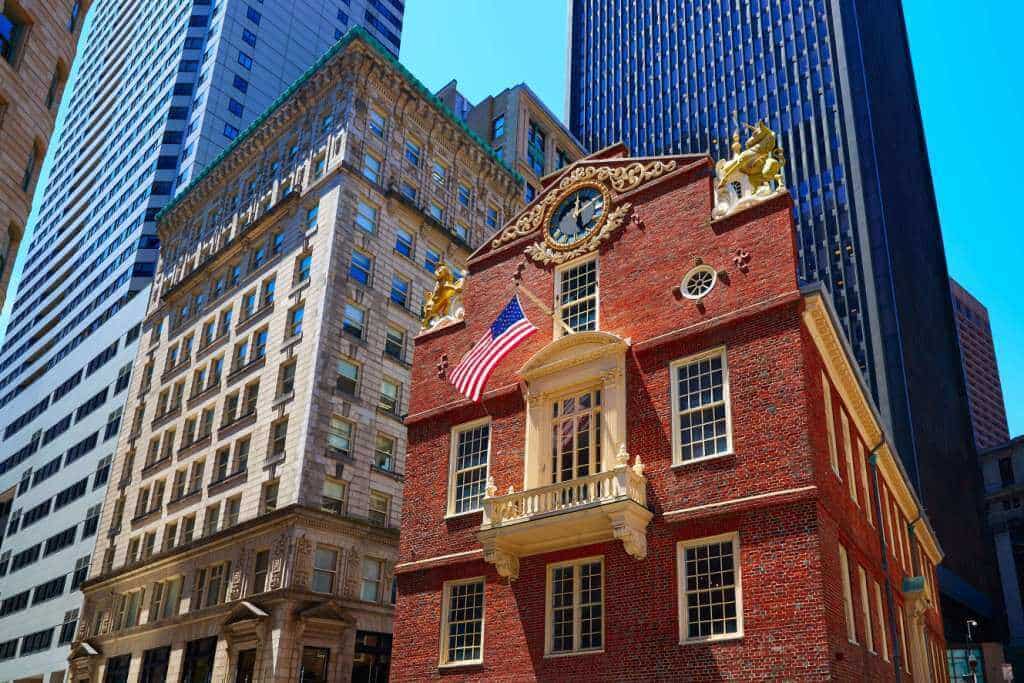
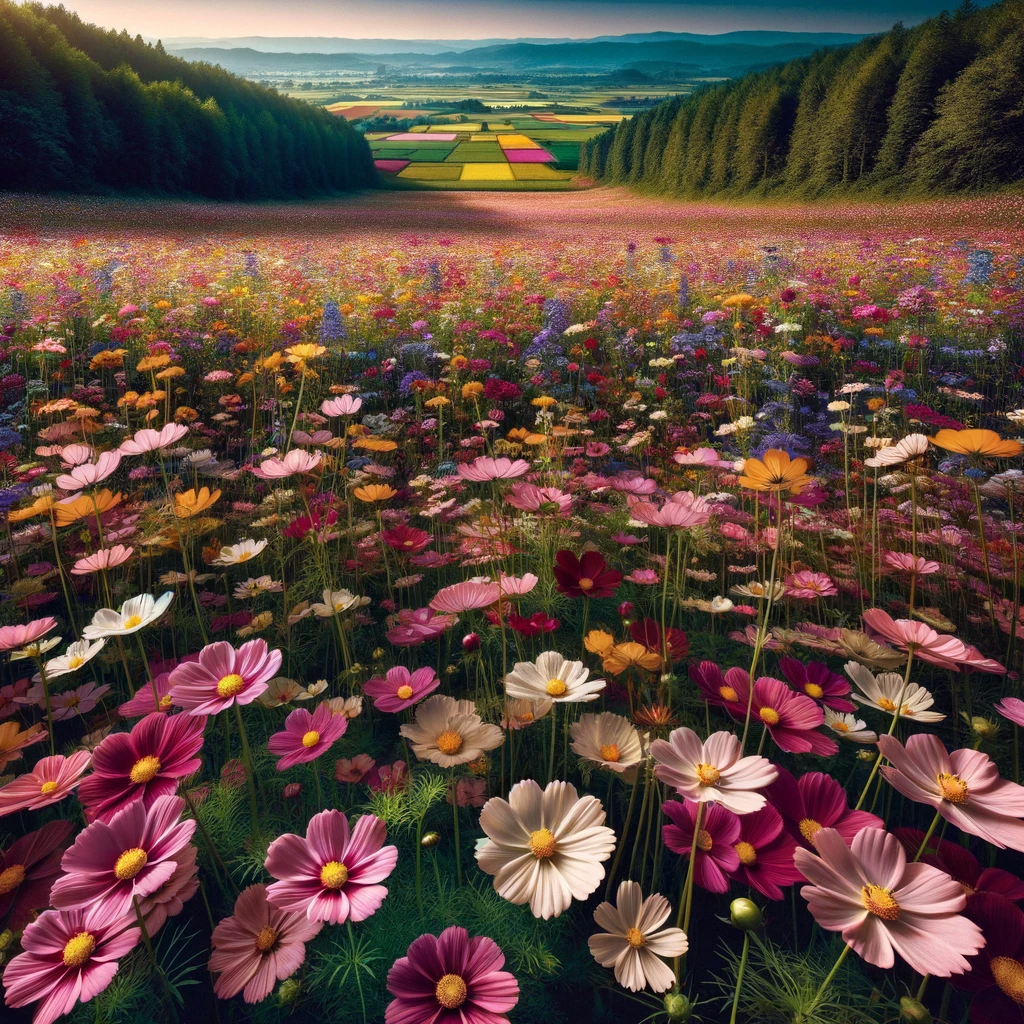
Color Theory in Composition: Utilizing colors strategically can vastly affect the mood and balance of an image. A photo with a complementary color scheme, such as red flowers against a green background, can be analyzed to show how colors can work together to make each other pop and create a vibrant, lively image.
Chiaroscuro: This is the art of using light and dark to give an illusion of depth. You can try taking a photo with a scene with a stark contrast between light and shadow, such as the dramatic lighting on a subject’s face, half-illuminated, half in shadow, creating a mood of mystery and intensity.
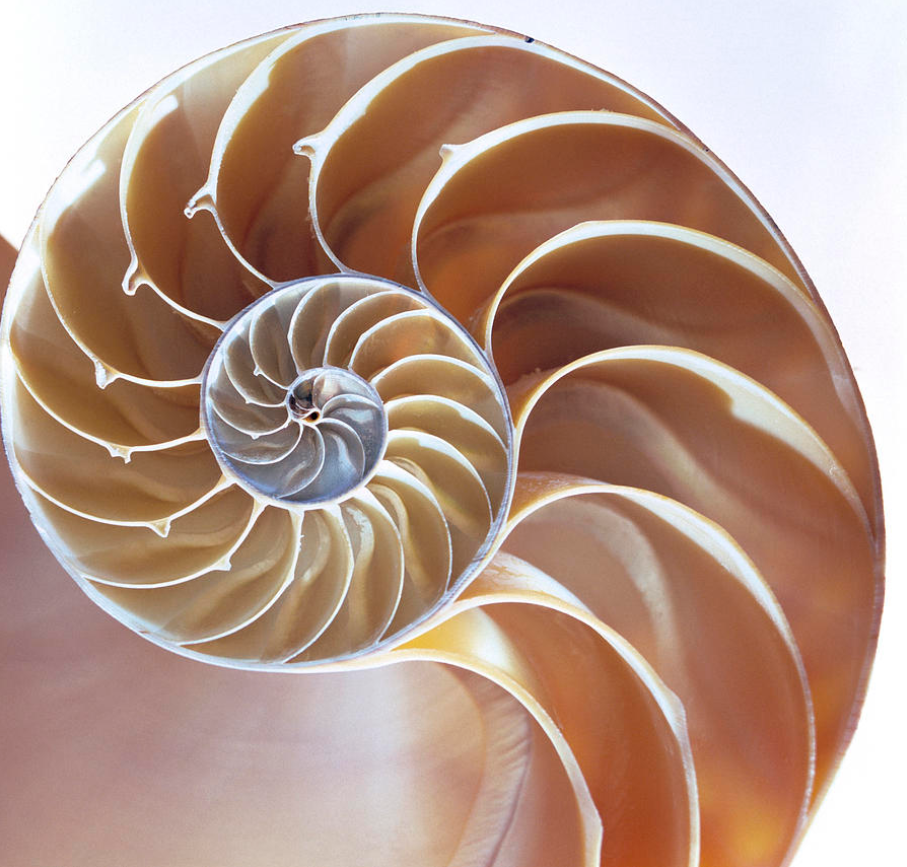
Golden Ratio and Spirals: A step beyond the rule of thirds, the golden ratio is a compositional structure that creates a naturally pleasing balance. This image of a nautilus shell with its natural spiral could serve as a perfect example, with an overlay of the golden spiral to show how the elements of the image align with this mathematical principle.
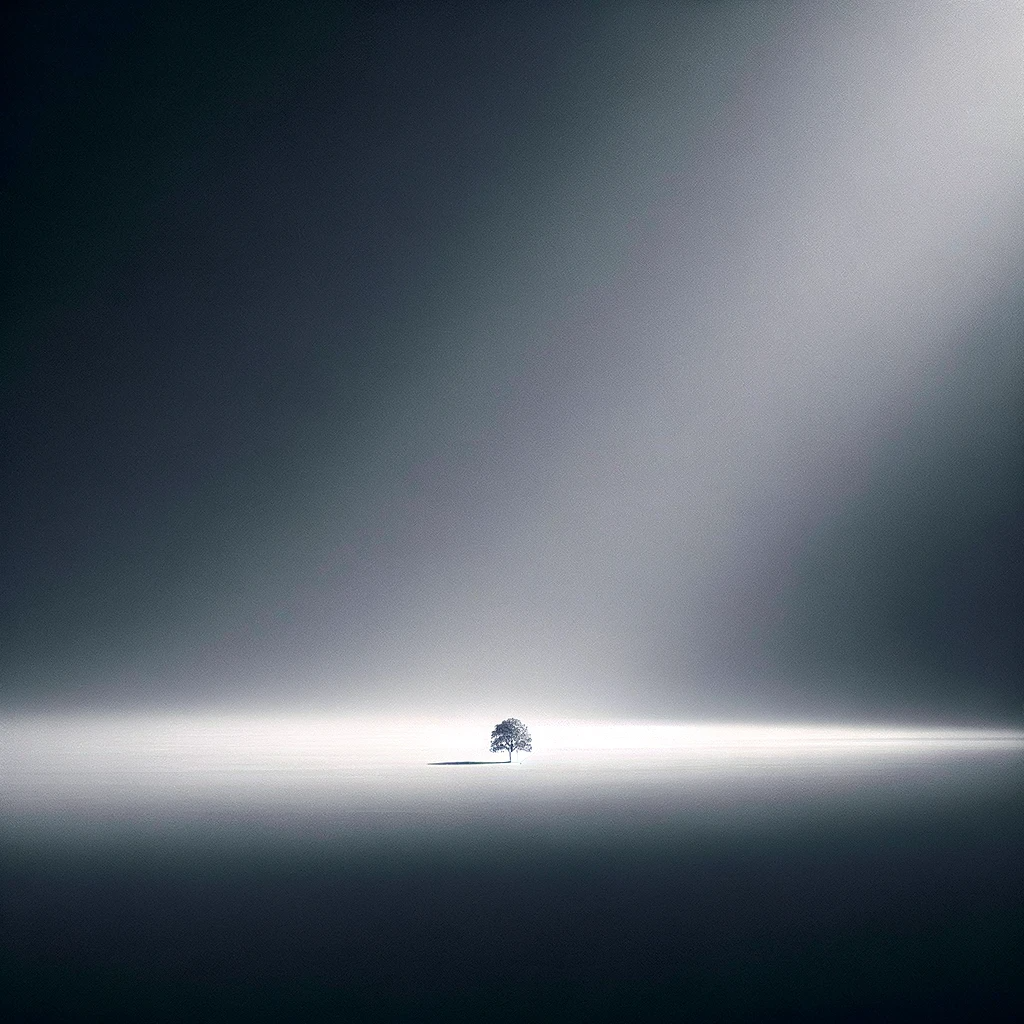
Negative Space as a Subject: Sometimes what is not there can be as powerful as what is. An image that effectively uses negative space might show a small subject in a large empty space, creating a sense of isolation, tranquility, or emphasis on the subject’s singularity.
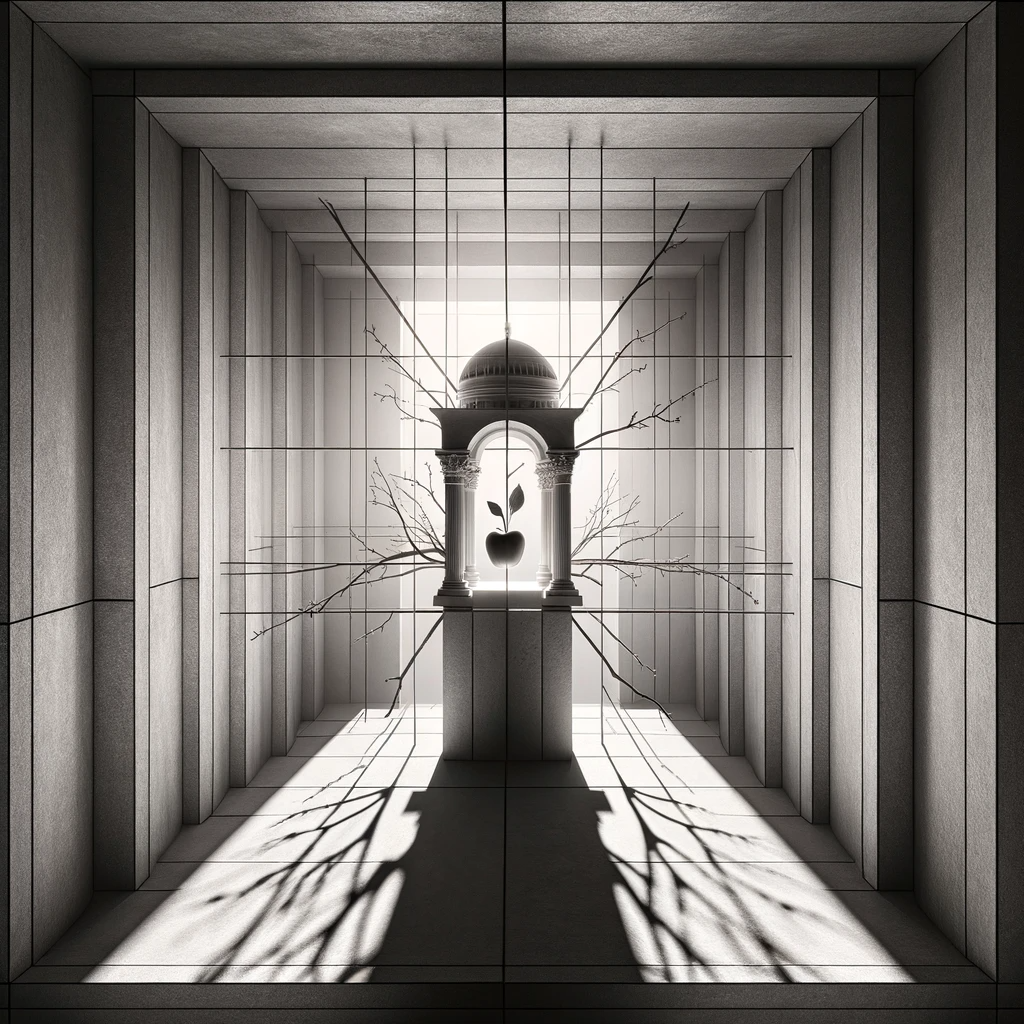
Breaking the Rules: Sometimes, the most impactful compositions come from knowing the rules well enough to break them effectively. An image that breaks conventional composition rules, such as centering the subject or having elements ‘cut’ the corners of the frame, can be analyzed to show how such departures can add tension, interest, or dynamism to a photograph.
Each of these techniques would ideally be accompanied by a demonstrative image or a set of images with a detailed analysis of how the technique is employed and the effect it has on the overall composition. This detailed analysis would examine the choice of technique, its execution, and its impact on the viewer’s experience of the image. In practice, these advanced techniques can elevate a photograph, transforming it from a mere capture of a moment to a thoughtful and evocative piece of art.
Real-world Application and Exercises
For photographers venturing into the field, a practical guide or checklist can serve as a valuable tool to refine their compositional skills. Below is a step-by-step guide designed to assist photographers in making deliberate and impactful compositional choices.
Step-by-Step Guide for Compositional Excellence:
- Preparation: Before you shoot, familiarize yourself with your equipment and settings. Know what your camera can do and how to quickly adjust the necessary settings.
- Observation: Take in your surroundings. Look for light sources, shadows, colors, and potential subjects. Spend more time looking with your eyes before you look through the lens.
- Visualization: Imagine the final photograph you want to create. Think about the story you want to tell or the emotion you want to evoke.
- Composition Selection: Decide on your composition technique based on what you want to highlight. Consider the rule of thirds, leading lines, framing, or symmetry, among others.
- Positioning: Move around your subject to find the best angle. Sometimes, the best composition comes from looking at a subject from a new perspective.
- Fine-Tuning: Adjust your position, zoom, or lens to frame your subject just the way you want it. Pay attention to the edges of your frame and what is entering or leaving the shot.
- Focus: Make sure your subject is in focus. Use manual focus if necessary to ensure sharpness where you want it.
- Review: After taking the shot, review it. Look at the composition, the lighting, and the focus. Ask yourself if the image meets your initial vision.
- Adjust and Repeat: If the photo isn’t quite right, adjust your composition or camera settings and try again. Don’t be afraid to experiment with different compositions.
- Reflection: After your shoot, reflect on the images you’ve taken. What worked well? What didn’t? Learn from each shot to improve your future work.
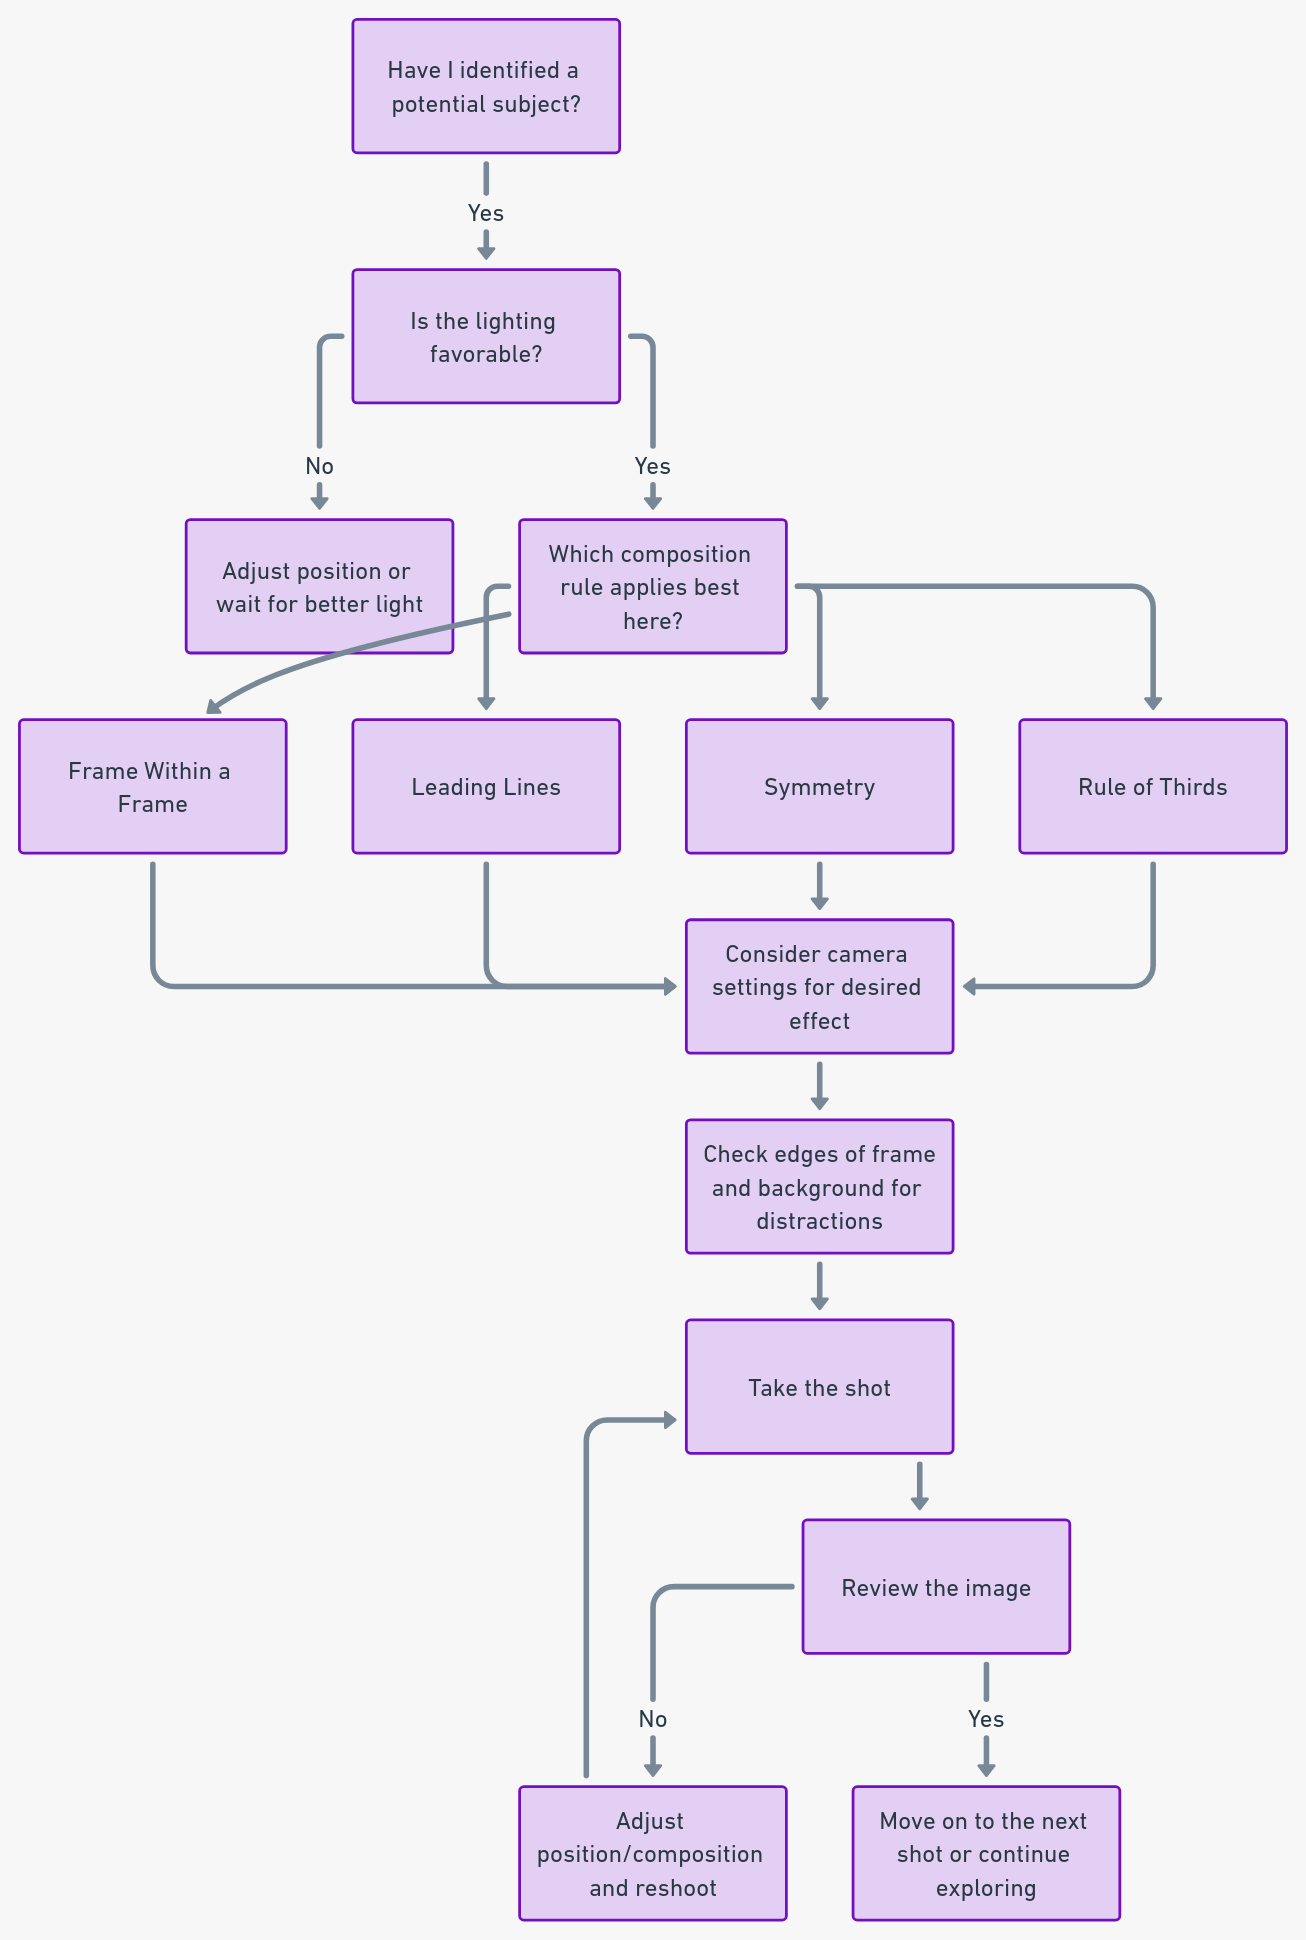
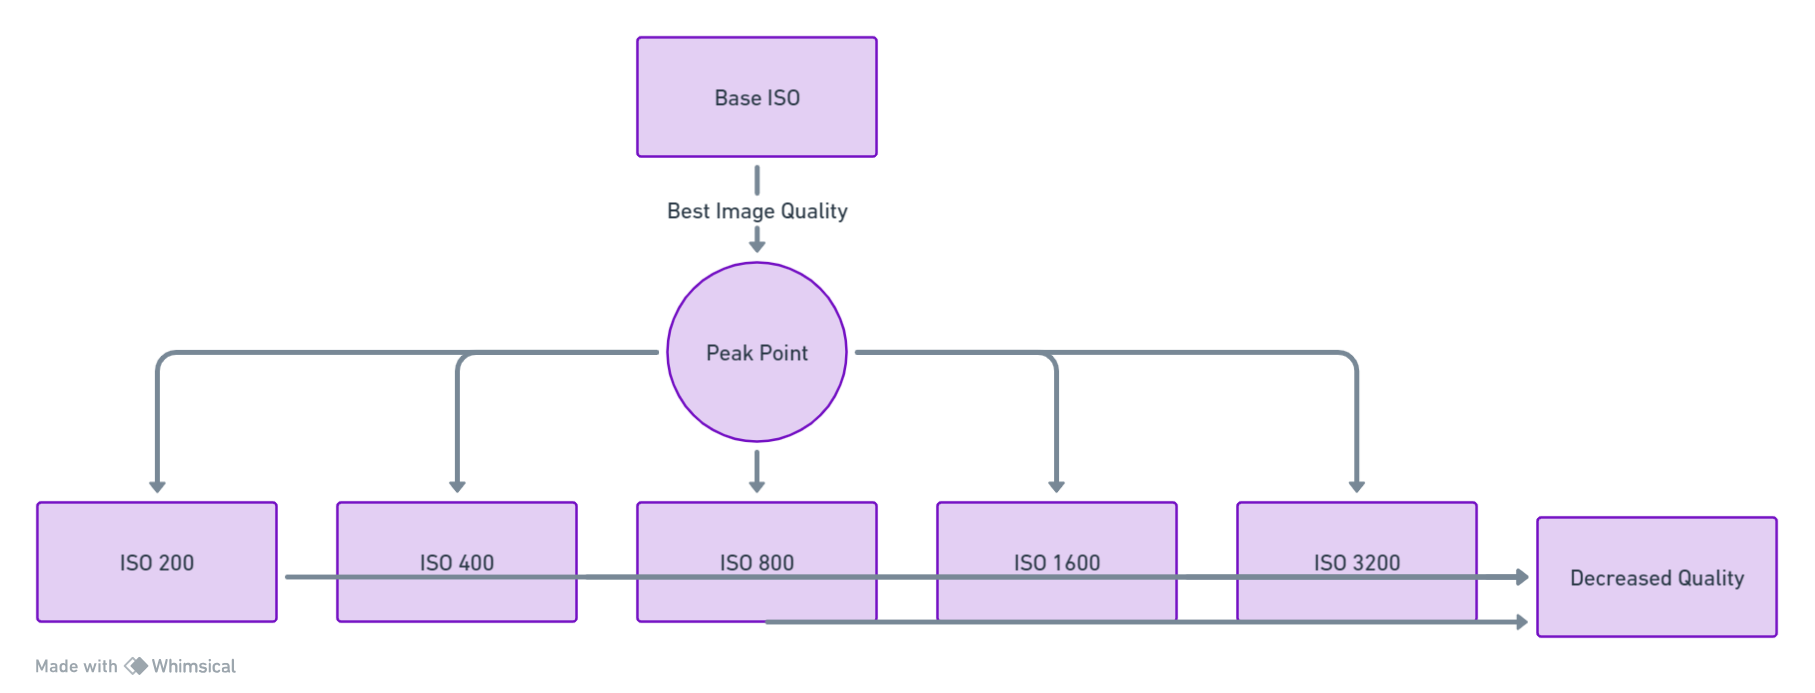
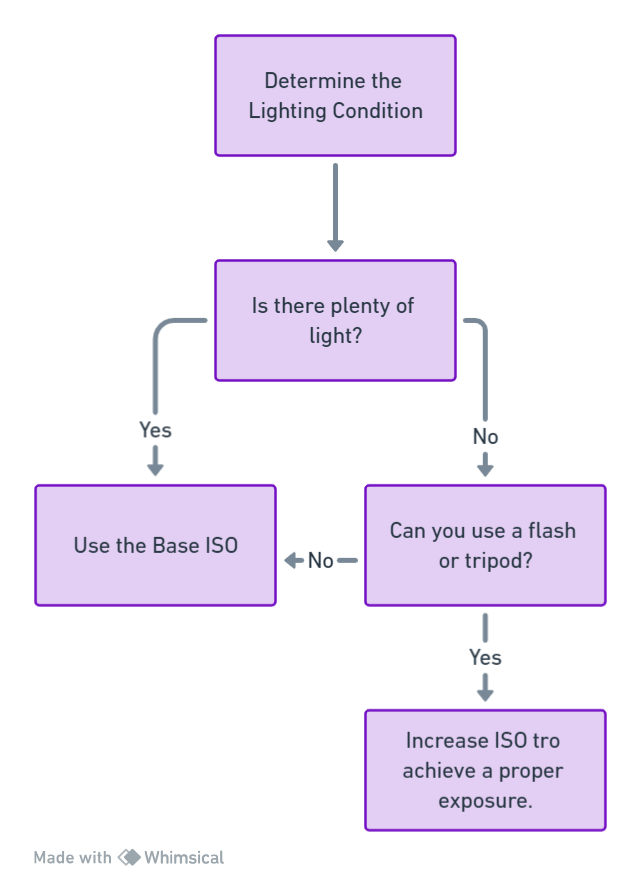
Using this guide and flowchart in the field, photographers can systematically approach the art of composition, ensuring they remain mindful of the many elements that contribute to a visually compelling photograph. These exercises can help photographers of all levels practice and improve their craft, turning the act of taking pictures into the art of making photographs.
Case Studies
In this section, we delve into detailed analyses of well-composed photographs across diverse settings. Each case study dissects the elements of composition that make each photograph effective, accompanied by sidebars featuring insights from the photographers themselves.
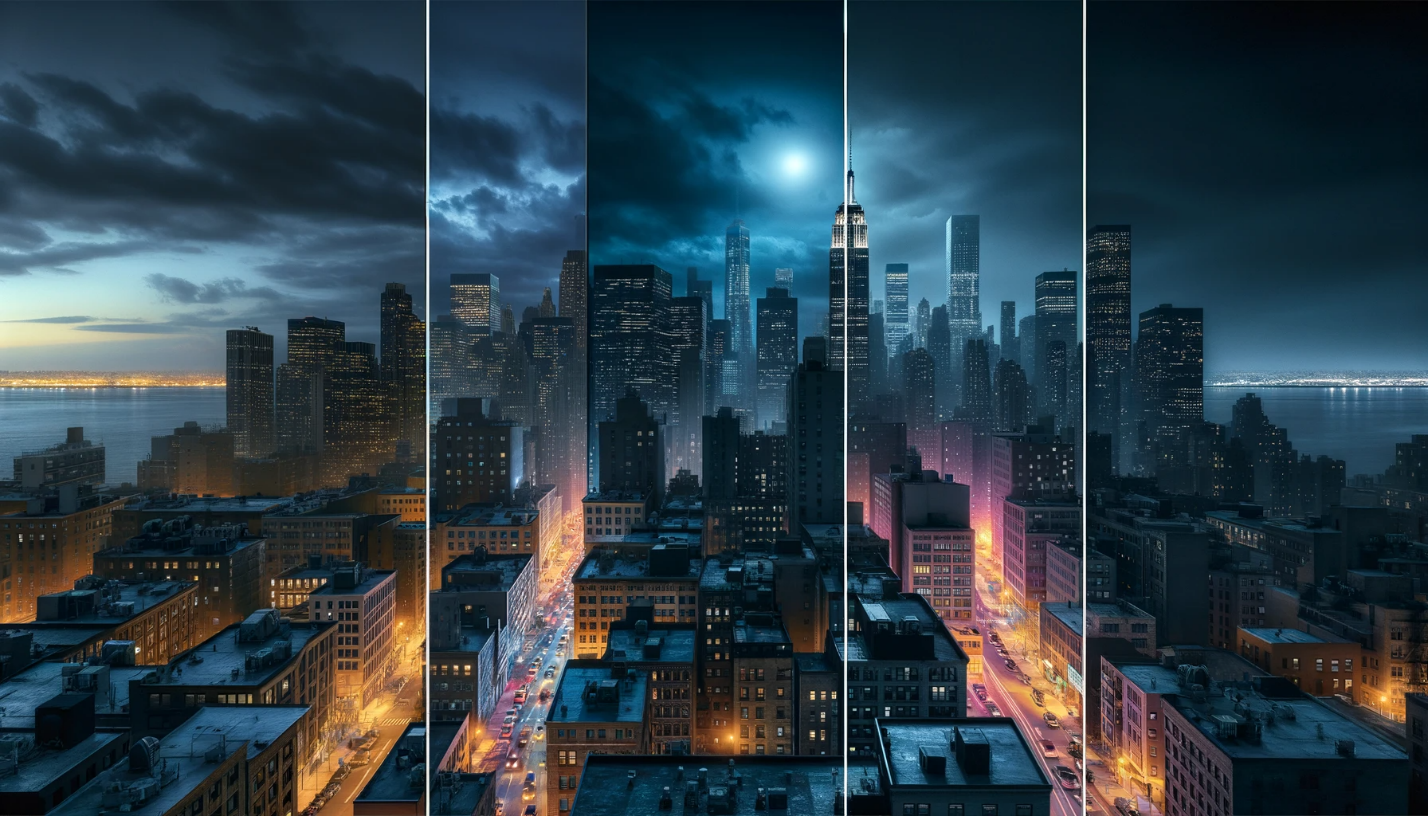
Case Study 1: Urban Landscape
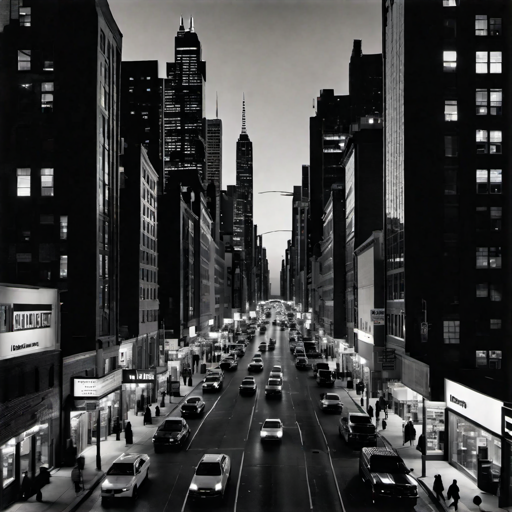
Composition Analysis:
- The leading lines of the road draw the viewer’s eye towards the center of the image, creating depth.
- The rule of thirds is applied with the horizon line set at the lower third, giving prominence to the urban skyline.
- The diminishing light from dusk provides a chiaroscuro effect, highlighting the buildings’ edges.
The choice to capture this scene in black and white was intentional to focus on the interplay of light and shadow, emphasizing the urban textures and patterns without the distraction of color.
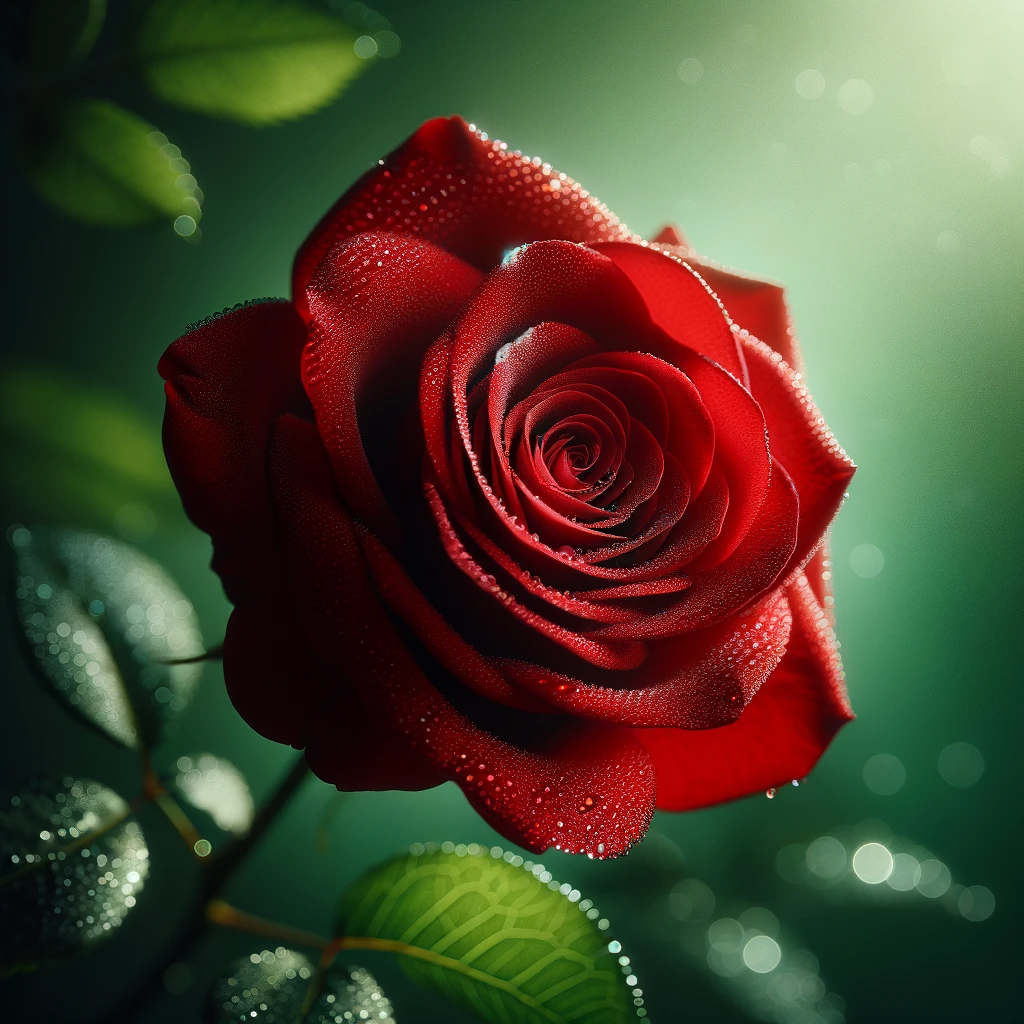
Case Study 2: Nature Photography
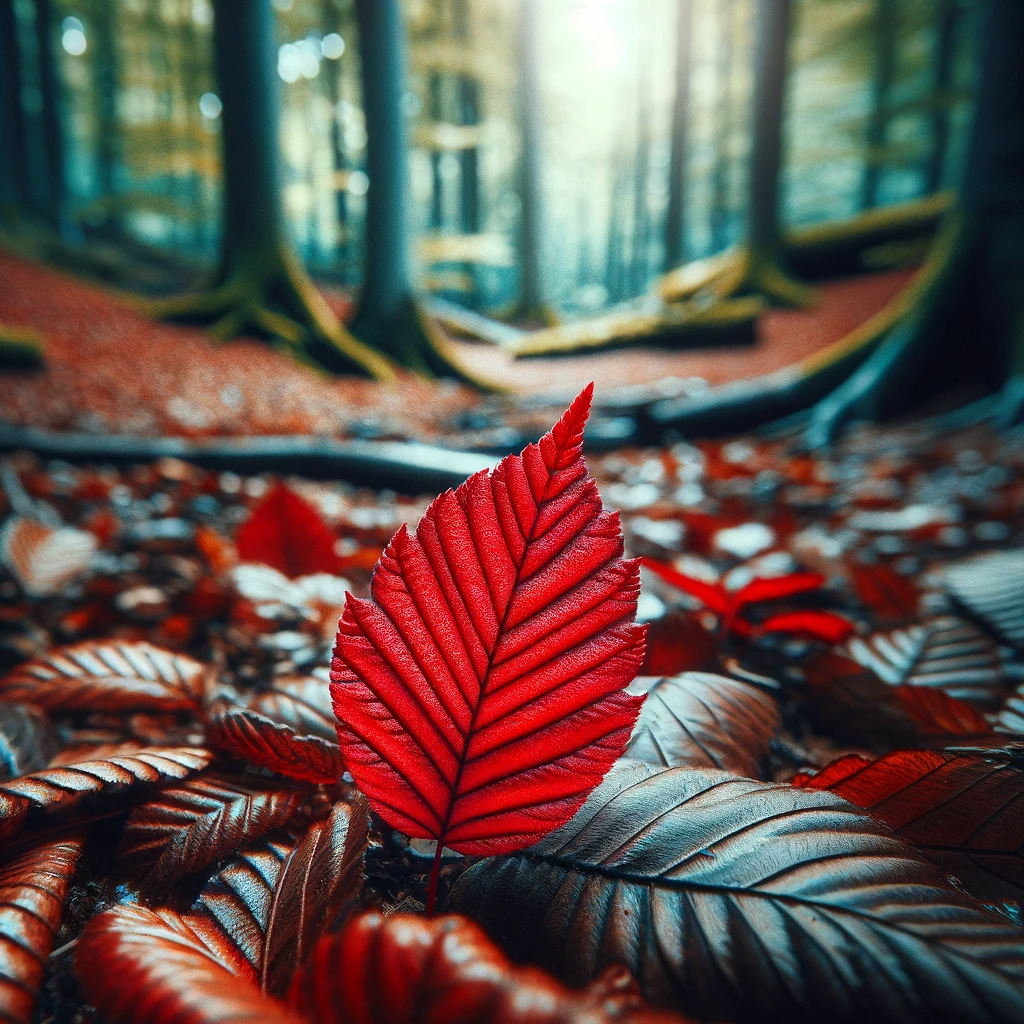
Composition Analysis:
- The red leaf is positioned off-center, creating interest and allowing the viewer’s eye to wander through the image.
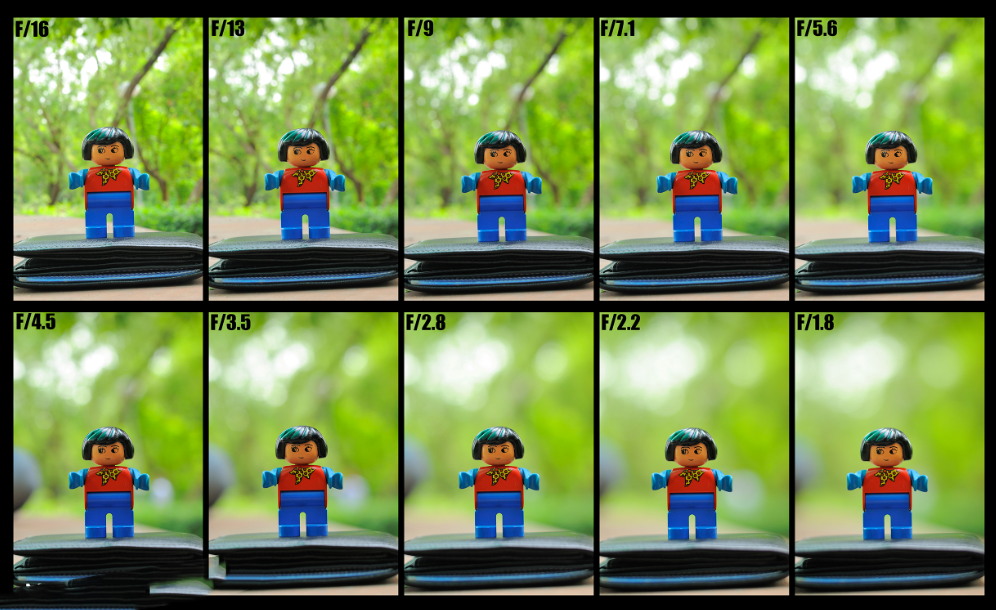
- The shallow depth of field isolates the red leaf as the subject, while the surrounding brown leaves provide a textured backdrop.
- The simplicity of the composition focuses on the contrast between the vibrant red and the subdued background.
The red leaf was a stark contrast to its environment, which was the story I wanted to tell—the beauty of a single, fleeting moment in nature.
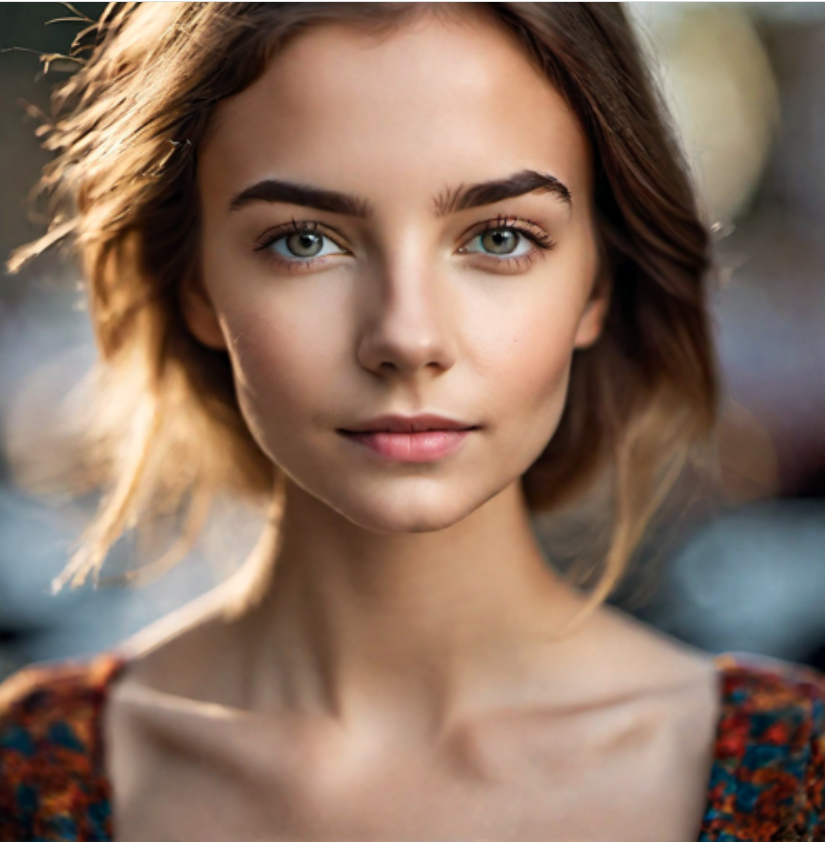
Case Study 3: Portrait Photography
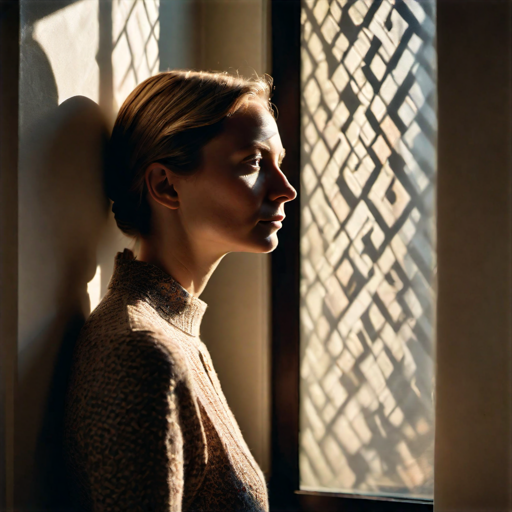
Composition Analysis:
- The subject is positioned near the window, following the rule of thirds, with the gaze adding directionality to the composition.
- The interplay of light and shadow creates a mood, adding emotional depth to the portrait.
- Negative space is used effectively, giving the subject room to breathe and allowing the viewer to contemplate the subject’s expression.
Capturing the subject in this contemplative state, with the natural light just so, required patience and a keen eye for the moment when all elements aligned.
Case Study 4: Wildlife Photography

Composition Analysis:
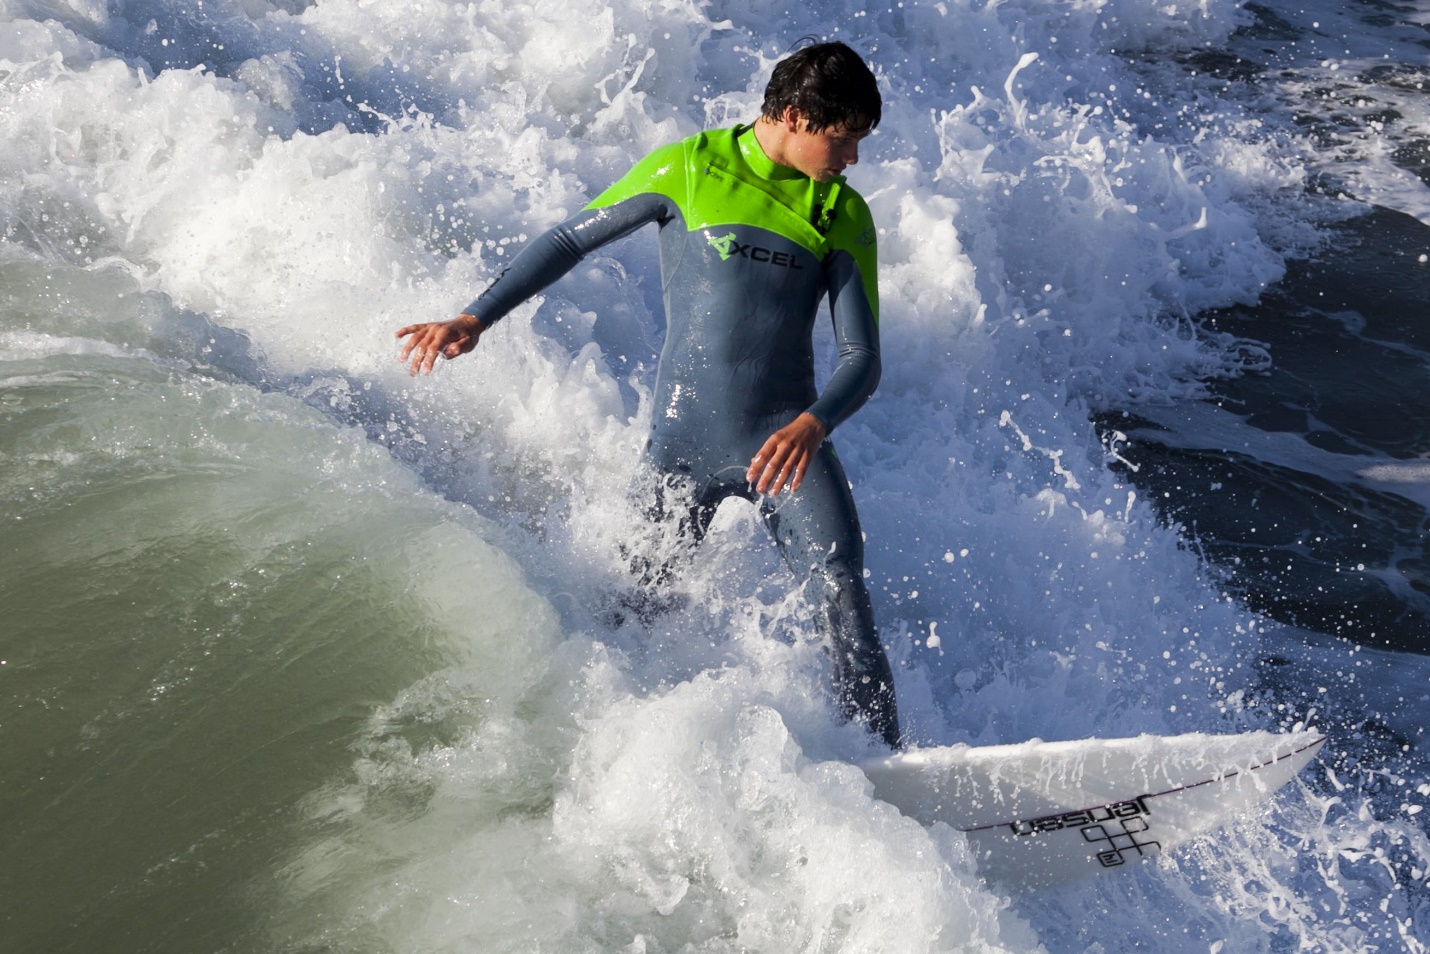
- Action is frozen with high shutter speed, capturing the peak moment of the leopard’s movement.
- The framing is tight, focusing on the leopard, but with enough space in the direction of the pounce to anticipate the movement.
- The background is sufficiently blurred, ensuring the subject stands out and the viewer’s focus remains on the leopard.
It was critical to balance the need for speed with the need for sharp focus. I waited for the perfect moment when the leopard’s motion towards its prey would be at its peak visual interest.
Each case study serves as a real-world application of compositional techniques, providing insight into the multitude of decisions photographers make to capture compelling images. These analyses reveal the thoughtful craftsmanship behind each shot and offer inspiration for photographers looking to enhance their own compositional skills.
Tools and Resources
Below is a table of various software and tools that can aid in composition planning and post-processing:
| Software/Tool | Purpose | Features |
|---|---|---|
| Adobe Photoshop | Post-processing | Layering, masking, color correction, content-aware fill, perspective warp |
| Lightroom | Photo editing and organizing | Presets, color grading, batch processing, lens correction |
| Skylum Luminar | AI-powered photo editing | Sky replacement, AI structure, sunrays filter |
| DxO PhotoLab | Image processing | Advanced noise reduction, optical corrections, smart lighting |
| Rule of Thirds Grid | Composition planning | Overlay for framing and aligning subjects during shooting |
| Golden Ratio Overlay | Composition planning | Helps in visualizing and applying the golden ratio in compositions |
| Leading Lines Finder | Composition planning | Tool to identify potential leading lines in a scene |
| ProCamera (iOS) | Mobile photography | Manual control over exposure, ISO, shutter speed; composition overlays |
| Snapseed | Mobile editing | Selective adjust, brush, healing, filters |
| Composition Aids | Hardware tools | Grid viewfinders, laser distance measurer for setting up scenes, geometric shape stencils |
Challenges and Assignments
Composition Challenge 1: Rule of Thirds
- Take a photo where your subject is off-center, aligned with one of the intersections in the rule of thirds grid.
- Example: A portrait with the person’s eyes at the top third intersection.
Composition Challenge 2: Leading Lines
- Find a scene where natural or architectural lines lead towards your main subject.
- Example: A pathway leading to a door, drawing the eye directly to the entrance.
Composition Challenge 3: Symmetry and Patterns
- Capture a scene that is symmetrical or find patterns that repeat within your frame.
- Example: The reflection of a mountain in a lake, creating a symmetrical composition.
Composition Challenge 4: Negative Space
- Use negative space to emphasize your subject, allowing it to stand out.
- Example: A lone tree in a vast field of snow, with the tree occupying a small portion of the frame.
Composition Challenge 5: Color and Light
- Create an image where color and light play a key role in the composition.
- Example: A street scene at golden hour, where the warm light enhances the colors of the buildings.
Conclusion
As we conclude our exploration of composition, it’s essential to remember that its principles are not rigid laws but rather guidelines to enhance the visual storytelling of our images. Composition is inherently subjective, with its beauty lying in the eye of the beholder.
The final inspiring image is one that breaks away from traditional composition rules, yet speaks volumes in its aesthetics.

In the realm of composition, each photographer brings their unique perspective to the frame, turning the ordinary into the extraordinary. As you continue on your photographic journey, let these principles guide you, but never be afraid to let your creativity and intuition lead the way.


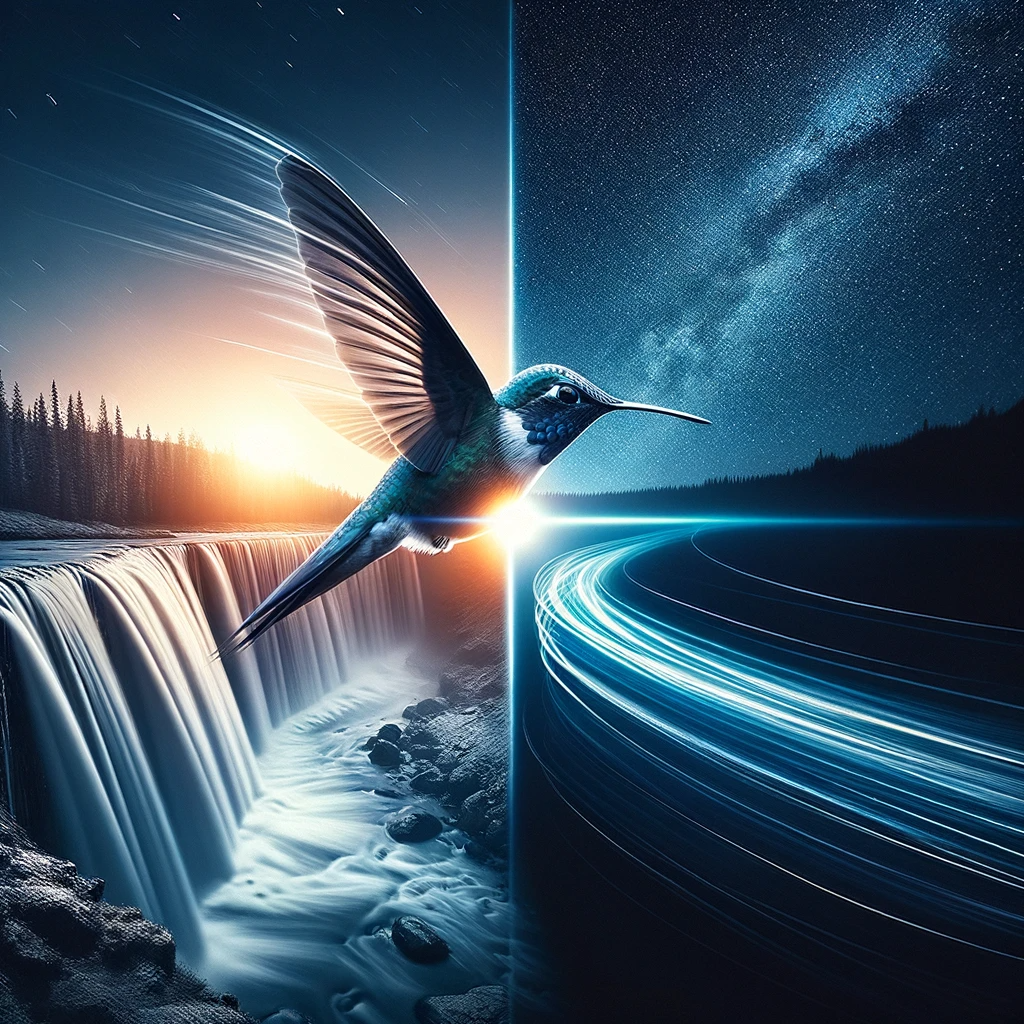

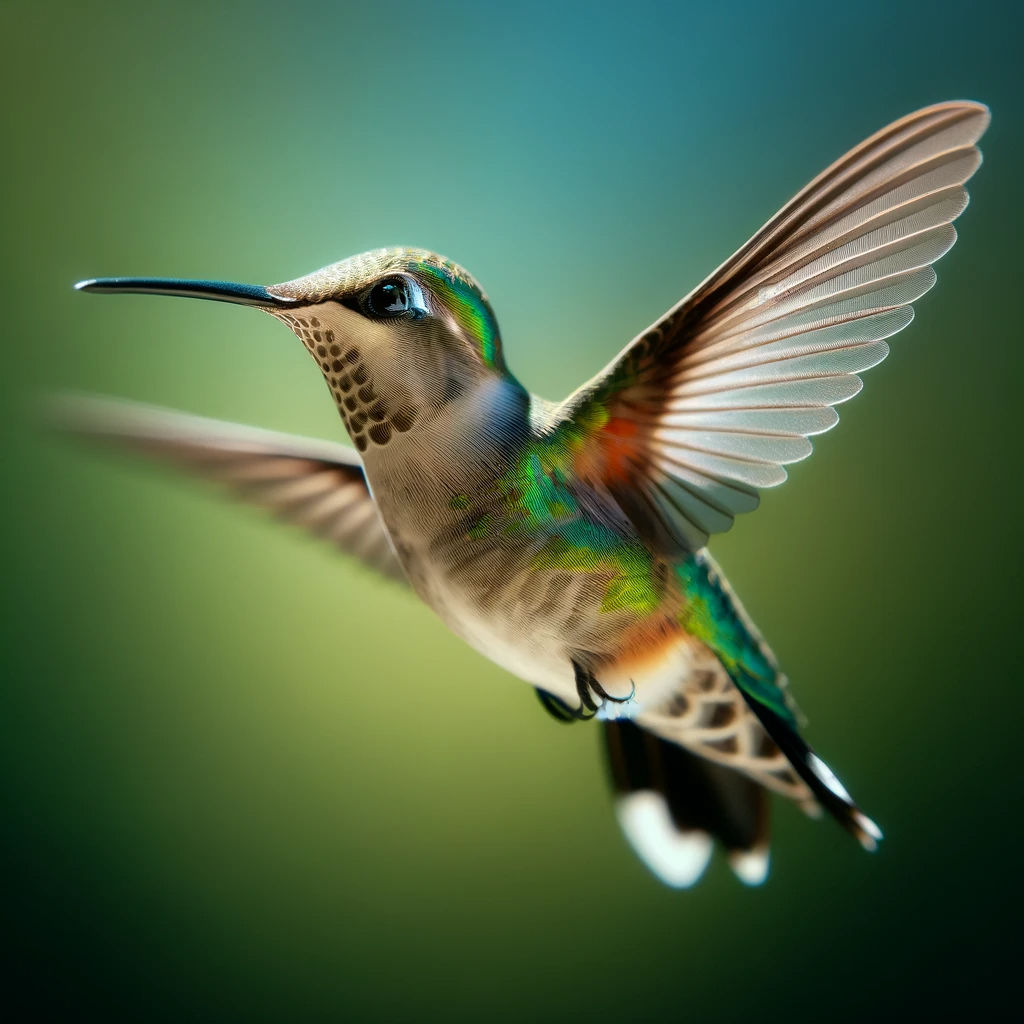 A crisp, clear photo of a hummingbird mid-flight at 1/2000.